User Manual
This guide explains in detail how to use the Brightstar | Payment Services Voucher System.
Our voucher system is designed for both customers and staff, so it includes two separate interfaces: a client-facing UI and a staff-facing UI. Customers use the system to purchase vouchers, while staff members are responsible for helping customers redeem vouchers and generate new voucher codes. Please click here to view the client facing user interface or click here to view the staff facing user interface.
Client Facing User Interface

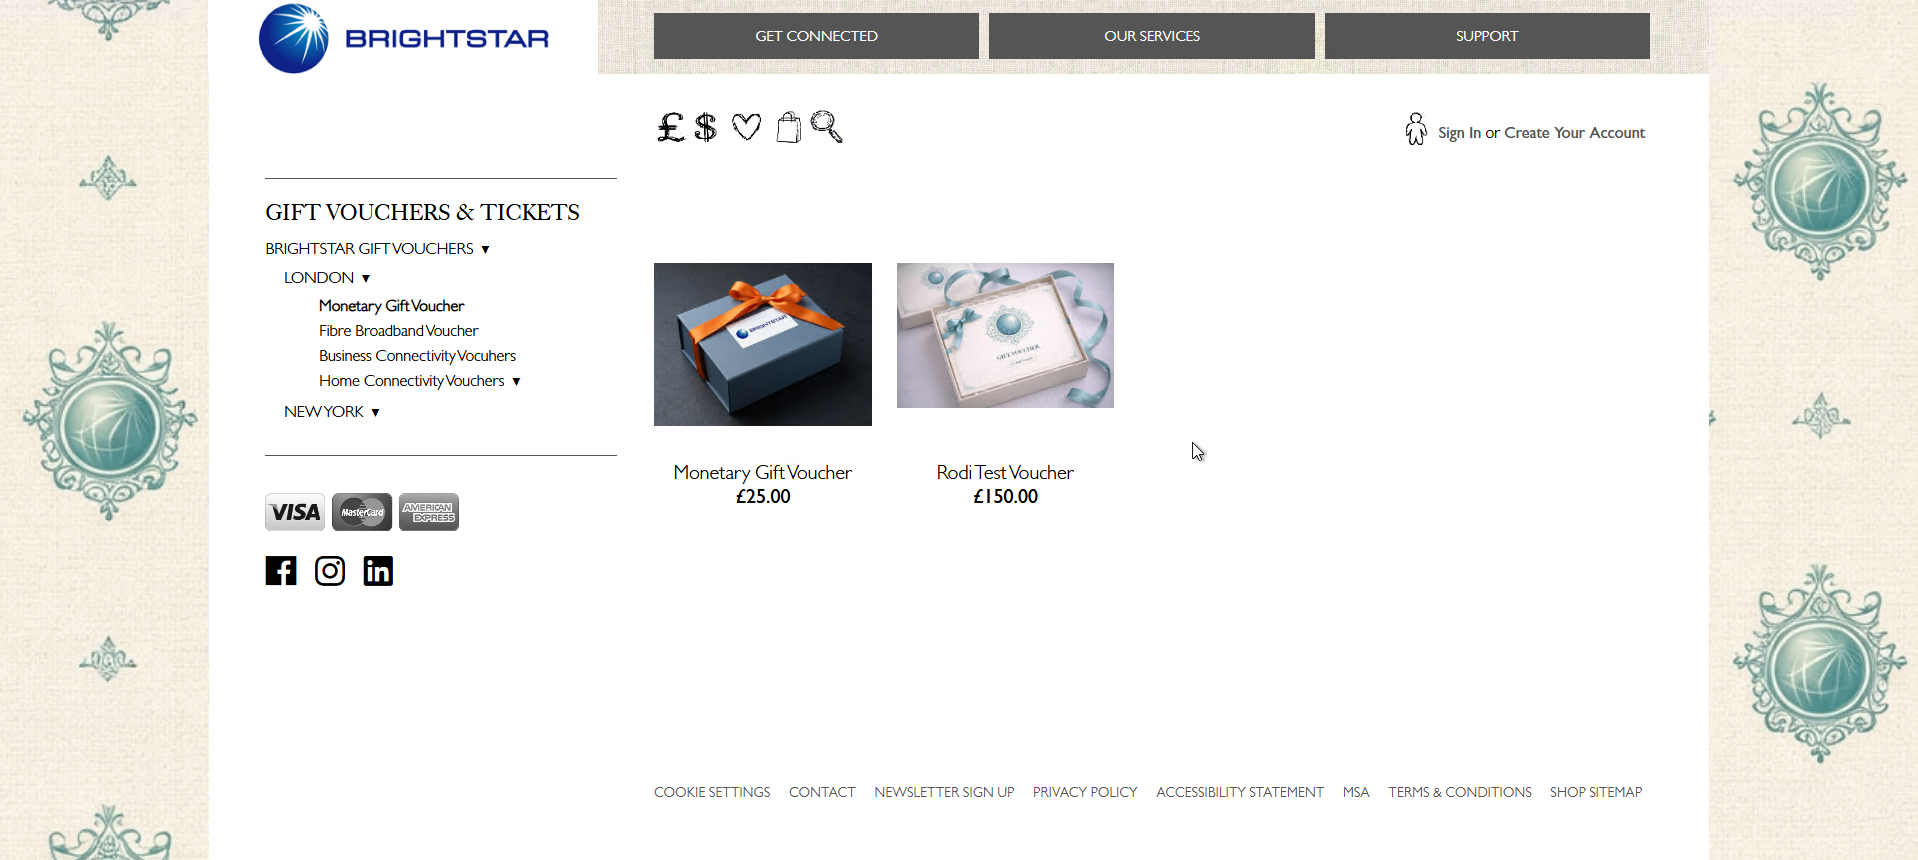
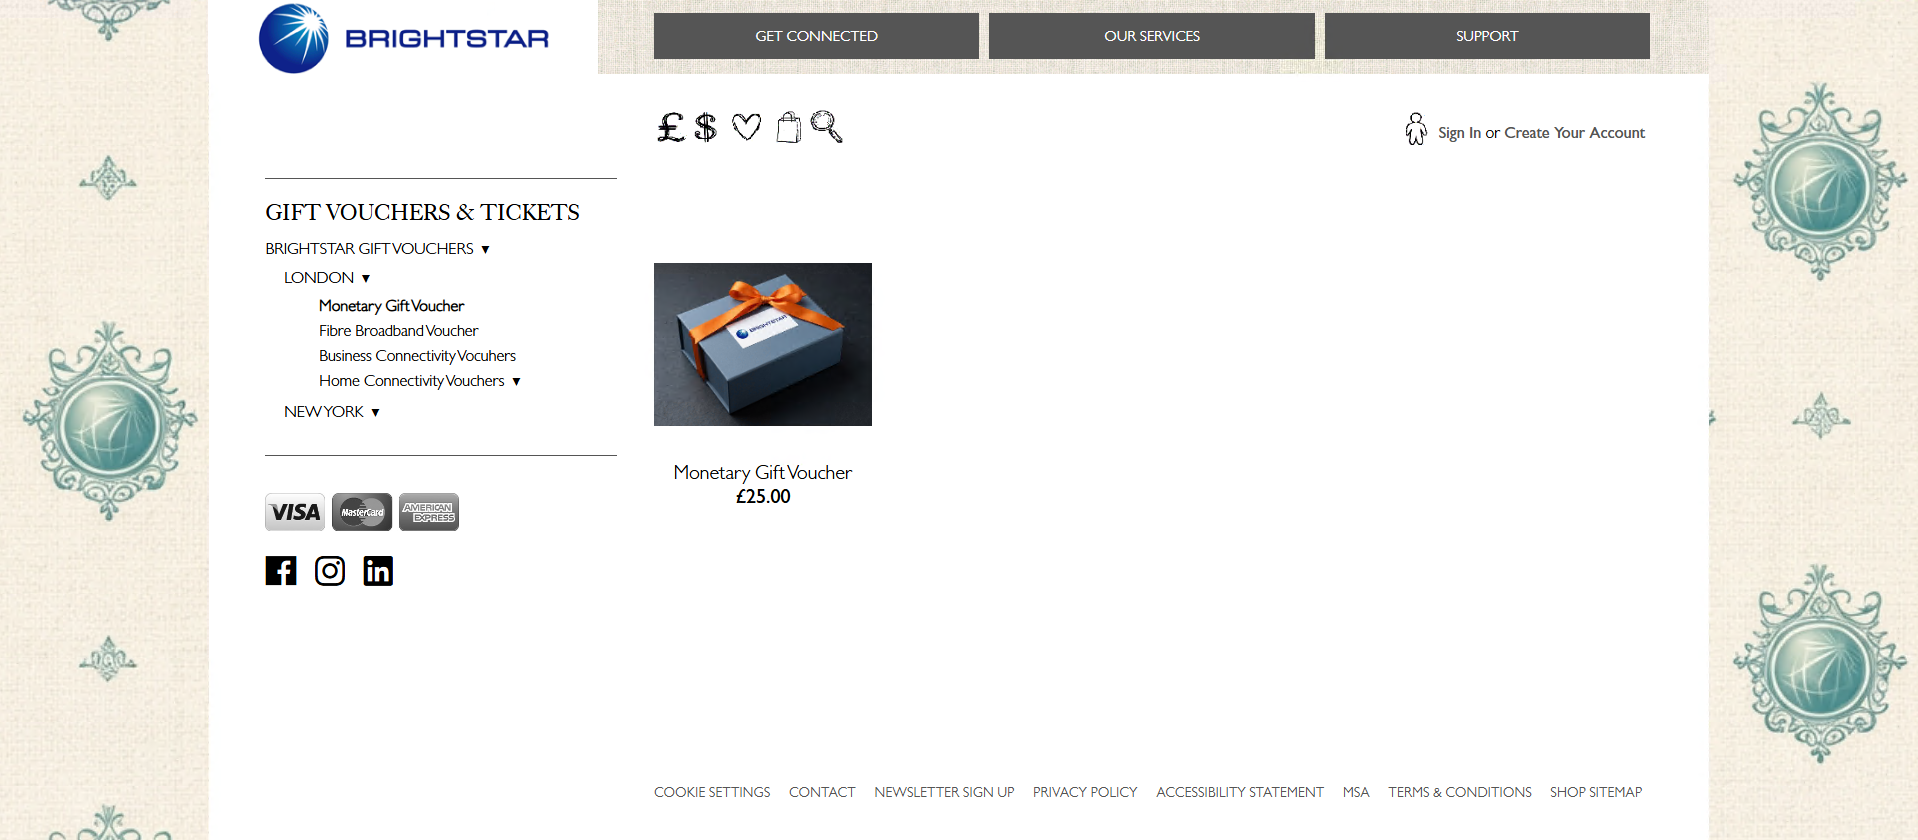
This is the main page where customers can purchase gift vouchers for their loved ones. On the left-hand side, the “GIFT VOUCHERS & TICKETS” tab displays other voucher types that can also be purchased. In this guide, the pages under “MONETARY GIFT VOUCHERS” are not explored individually because their design, layout, and logic are the same as the “MONETARY GIFT VOUCHER” page shown here.
The icons at the top of the page follow business requirements. The “£” and “$” icons allow prices to be displayed in either British Pounds or US Dollars. The basket icon updates to show the number of items in the basket and can be used to access it, and the final icon is a search tool.
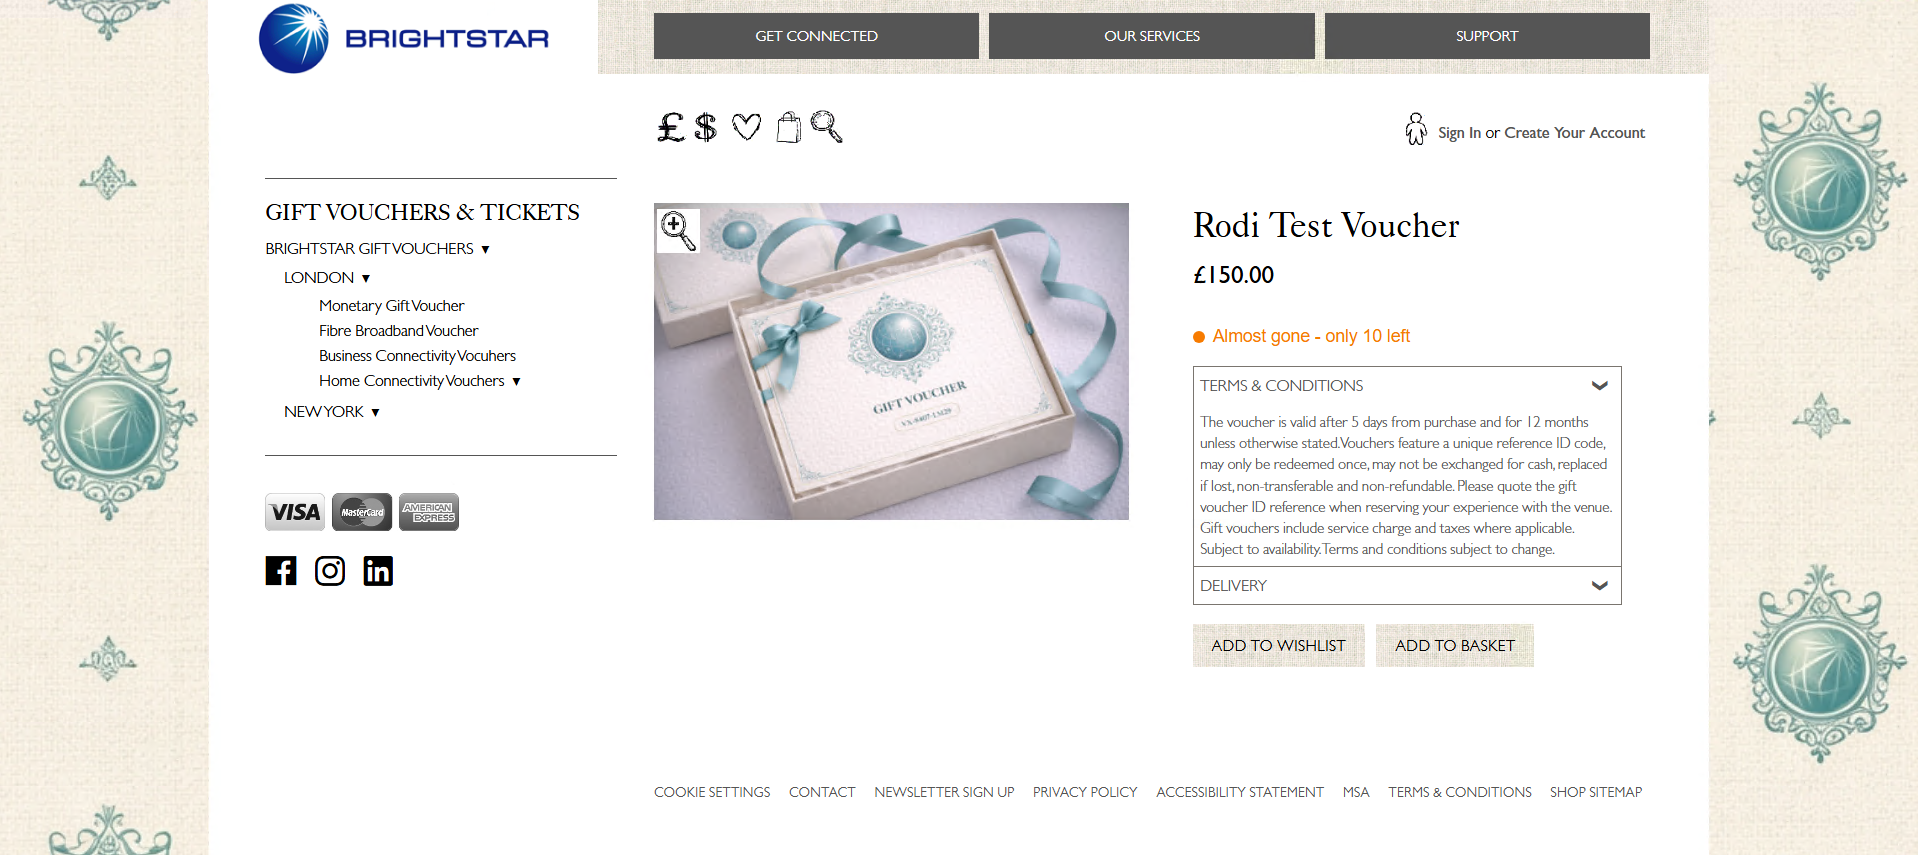
This page allows users to see what they are purchasing, view the preset voucher values, choose quantities, view stock levels, and view totals for each voucher as well as the overall basket total. Note: the design and layout of these pages can be fully customised to suit your business needs.
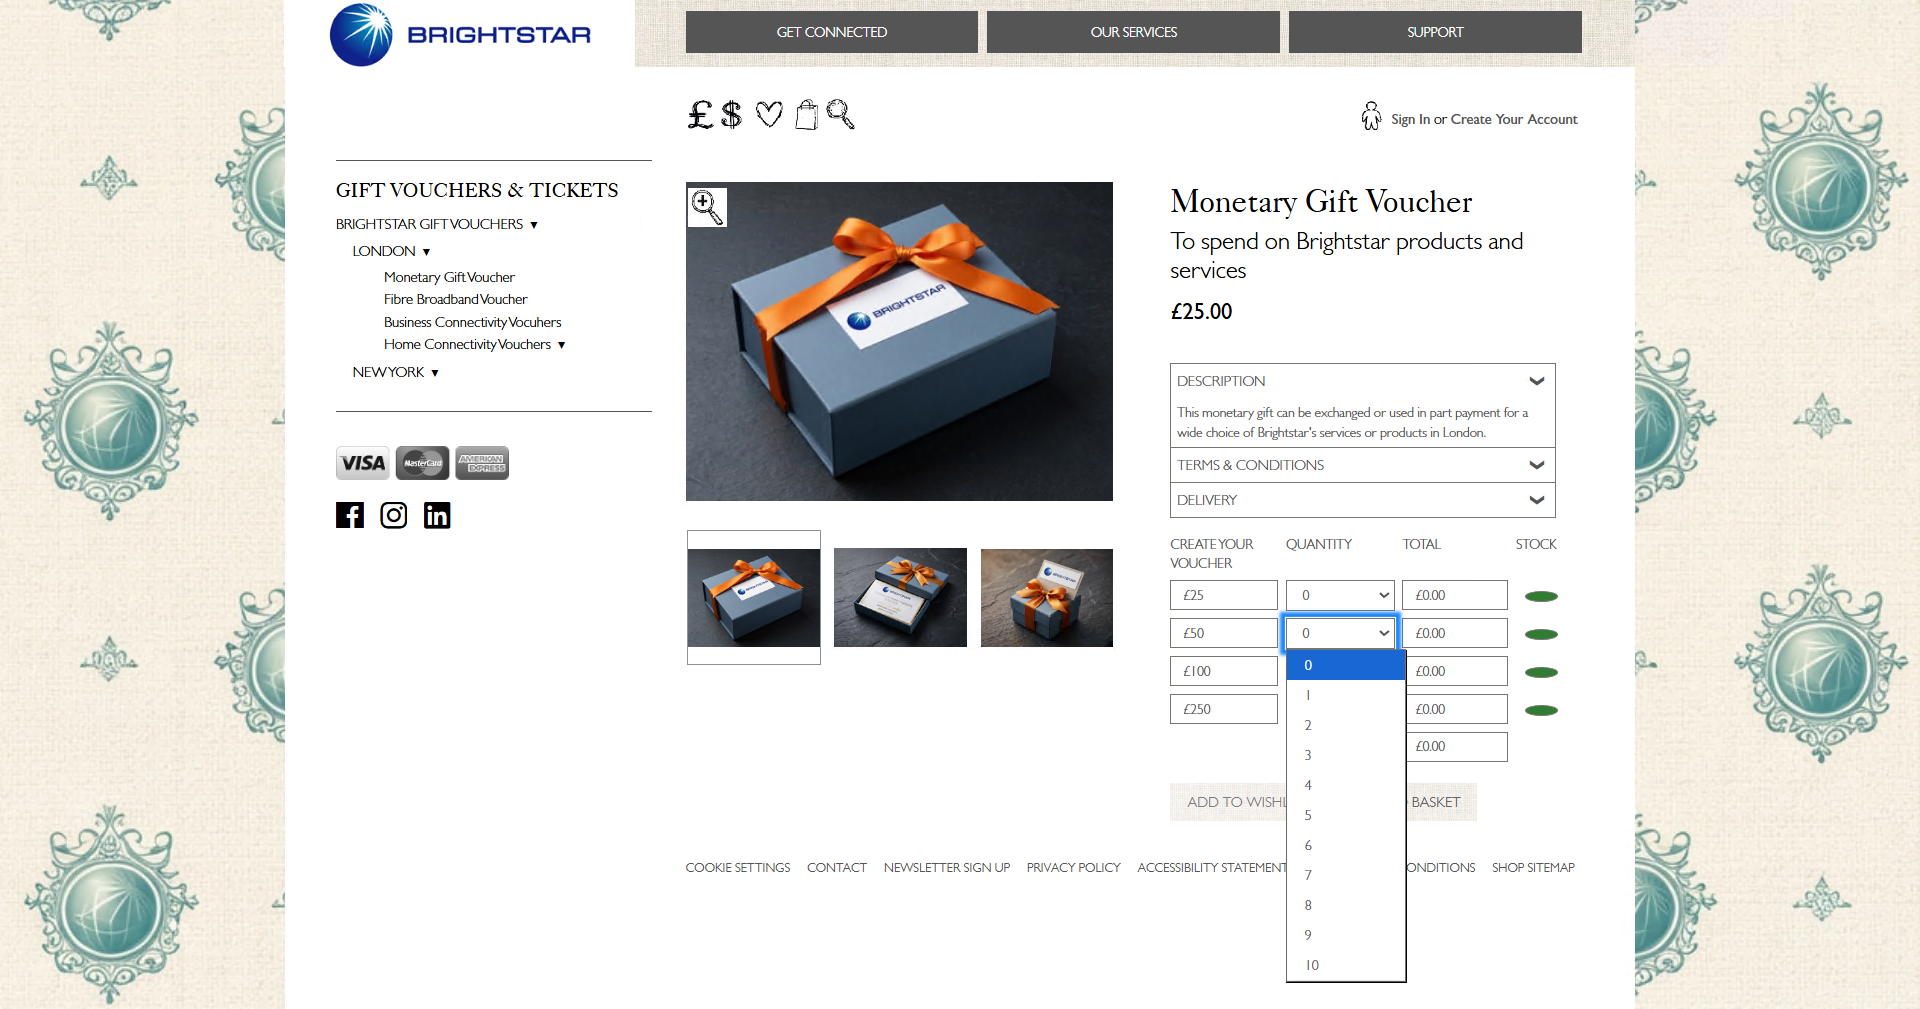
To make a purchase, the customer clicks on the quantity button next to the voucher value they wish to purchase. They may then select between zero and ten vouchers for each value and repeat this for multiple voucher types.
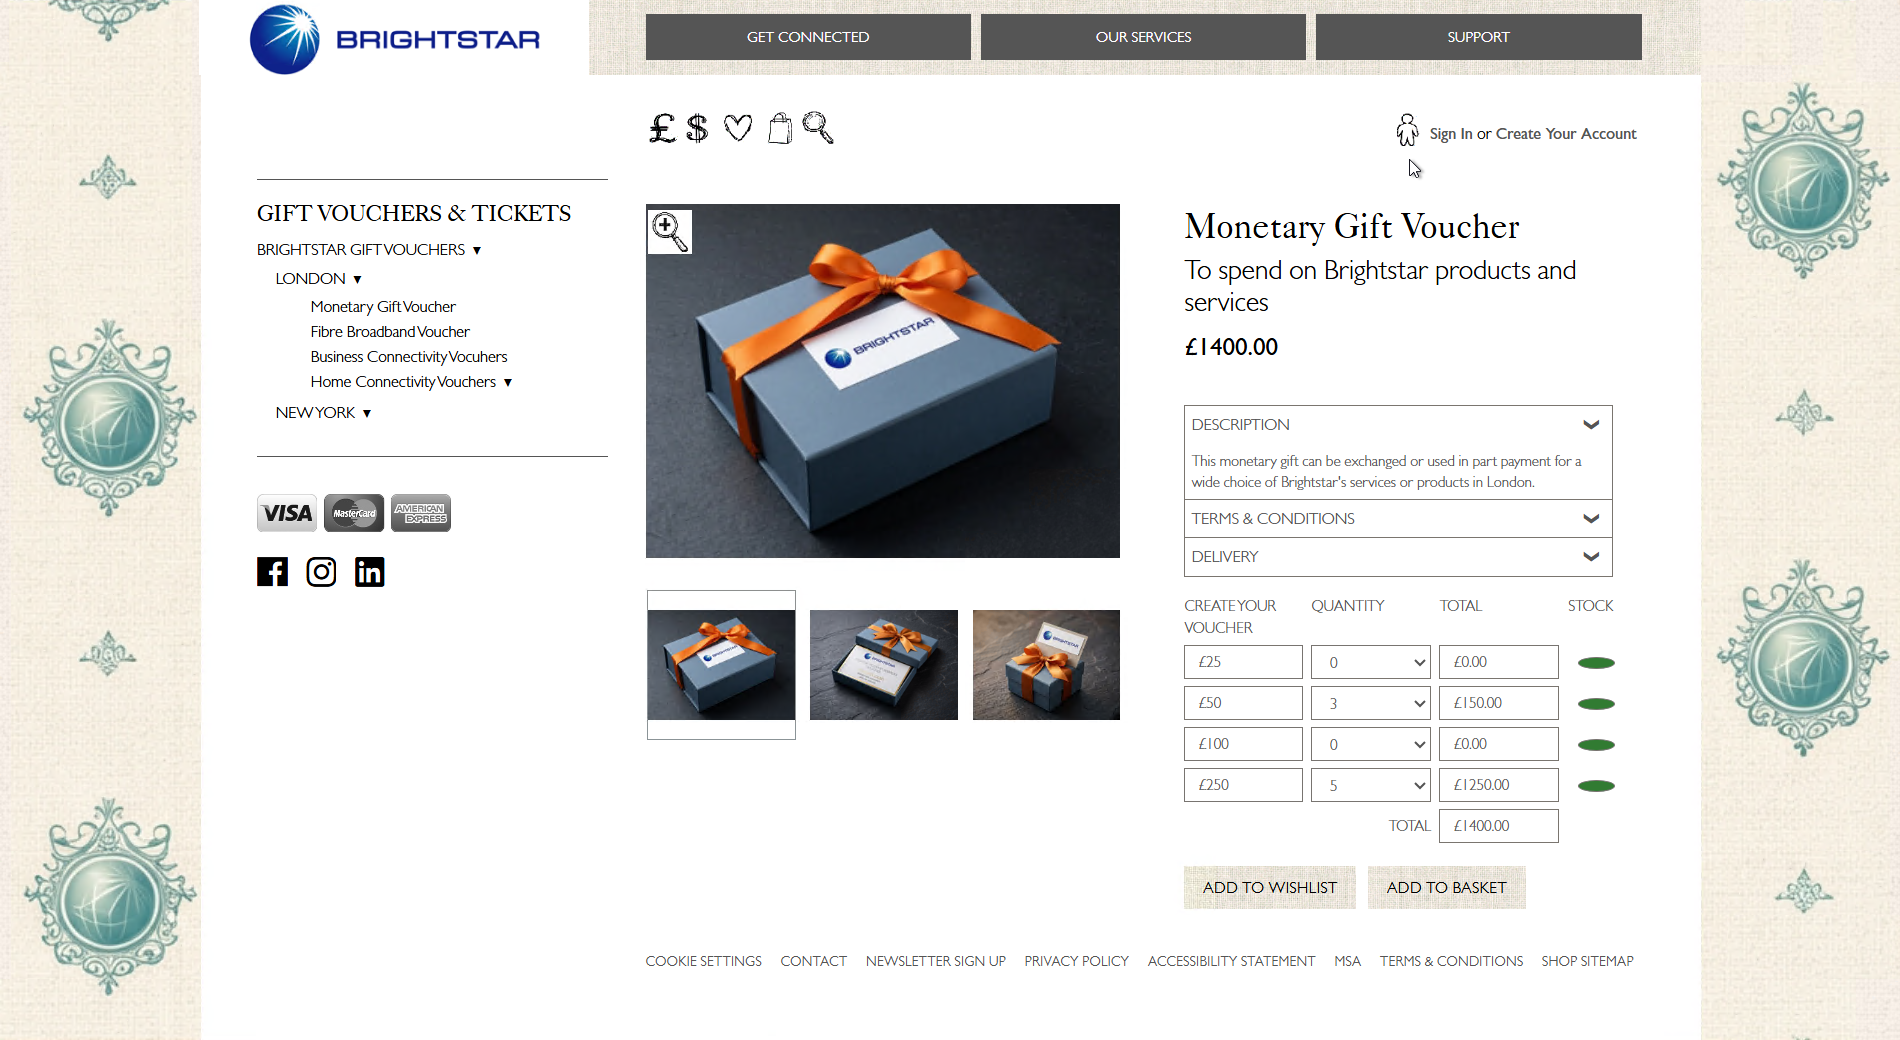
For example, the customer may select three £50 vouchers (£150 total) and five £250 vouchers (£1,250 total). The system automatically adds these amounts together and displays the basket total of £1,400. Once satisfied, the customer can either add the vouchers to their basket or add them to their wishlist.

When the “ADD TO BASKET” button is clicked, the page resets all voucher quantities and totals back to zero. Once the basket icon at the top of the page is clicked, a small popup will then appears showing key information such as the number of items in the basket, the total cost, and a breakdown of the selected vouchers. This popup also includes a “GO TO BASKET” button, guiding the customer towards the checkout process.
The basket icon at the top of the page will update to show the number of items added.
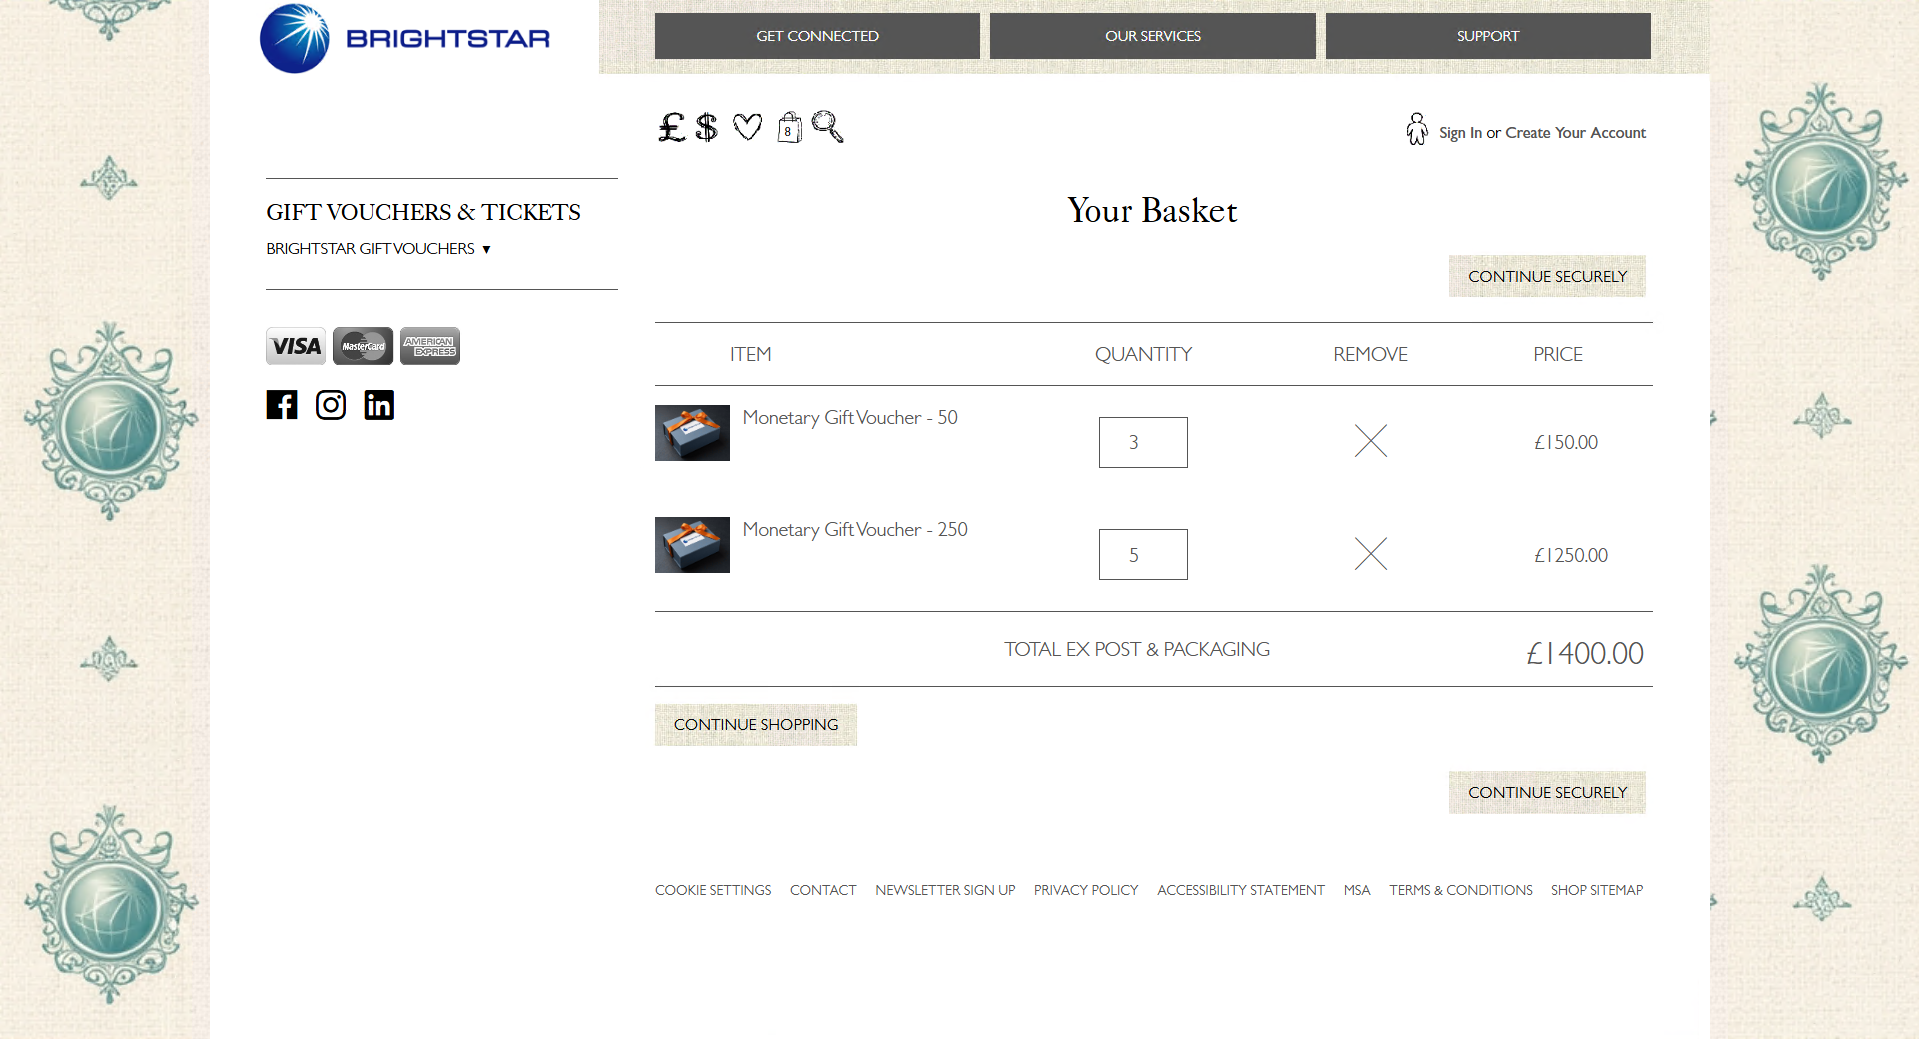
Users are directed to their basket once they click the “GO TO BASKET” button. Here, they can confirm their basket and either continue securely to complete their purchase or continue shopping if they wish.
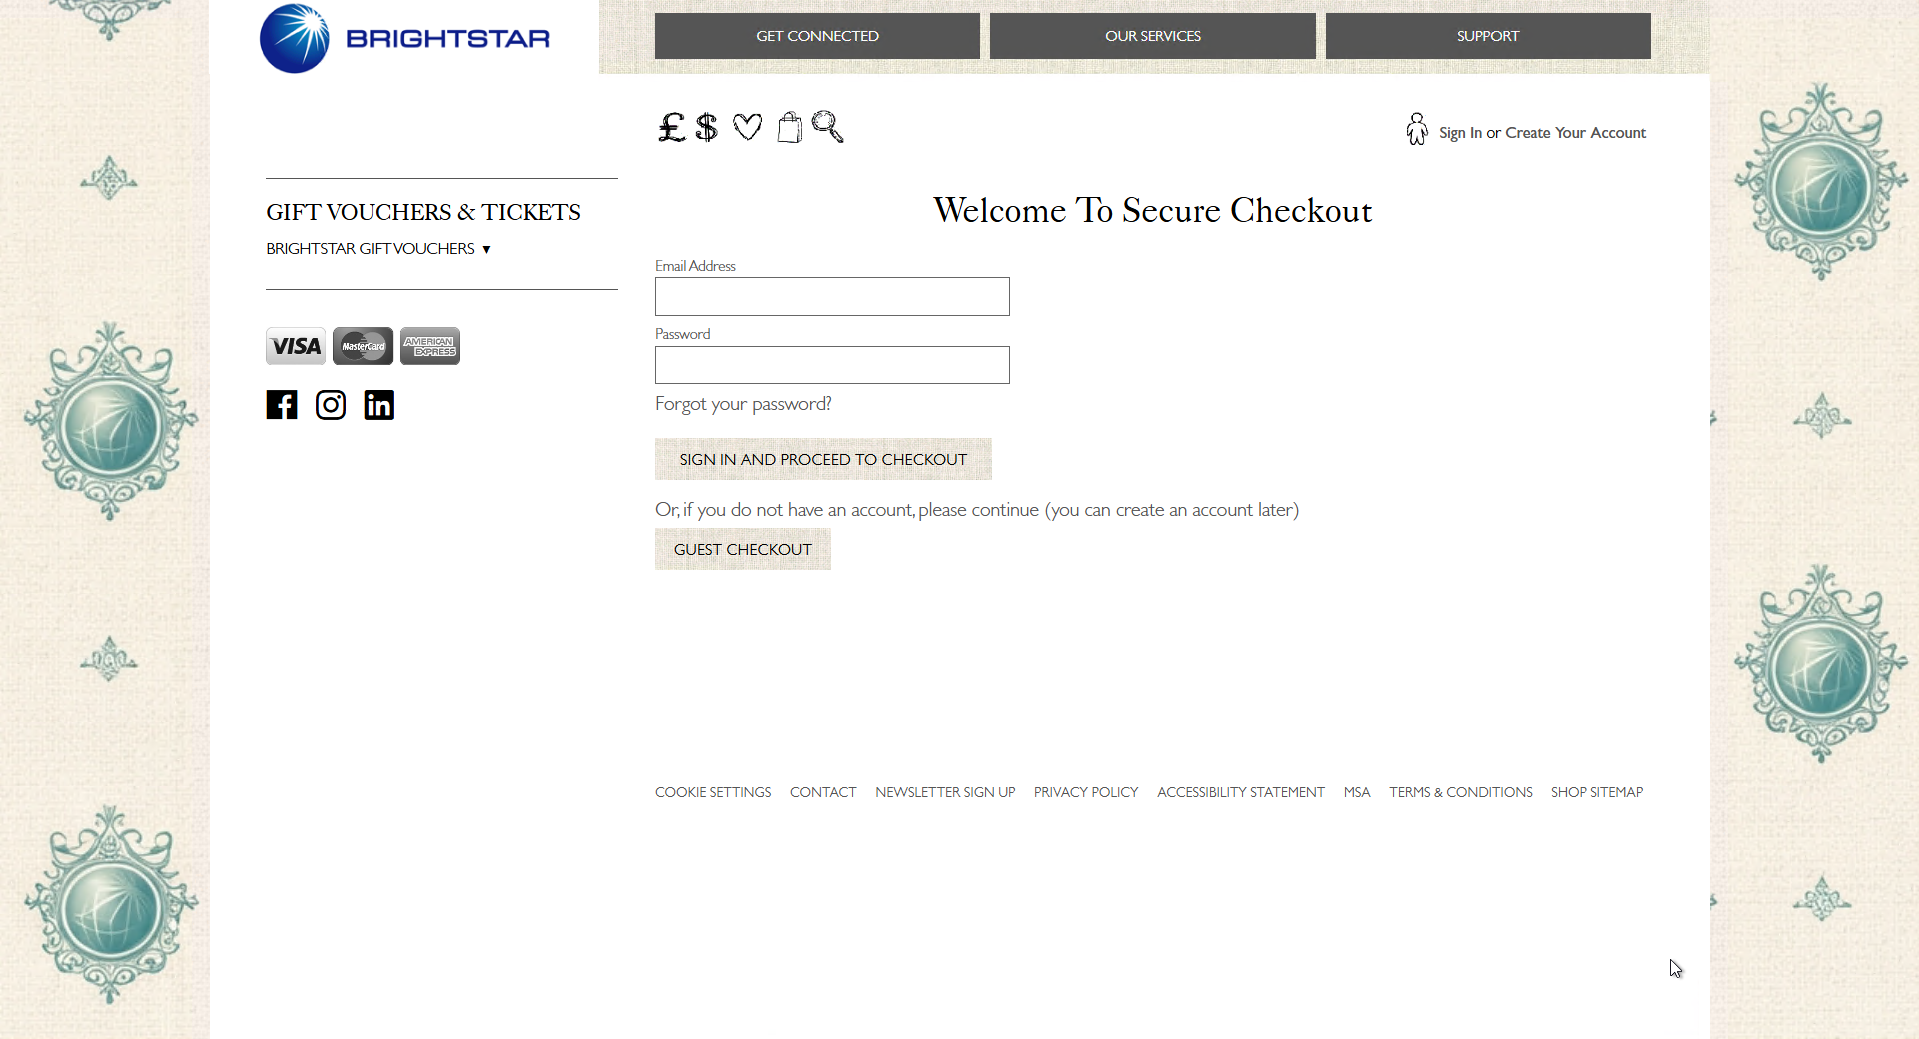
When customers click "CONTINUE SECURELY", if they are not already logged in, they will be prompted either to sign in and then proceed to checkout, or to continue as a guest.
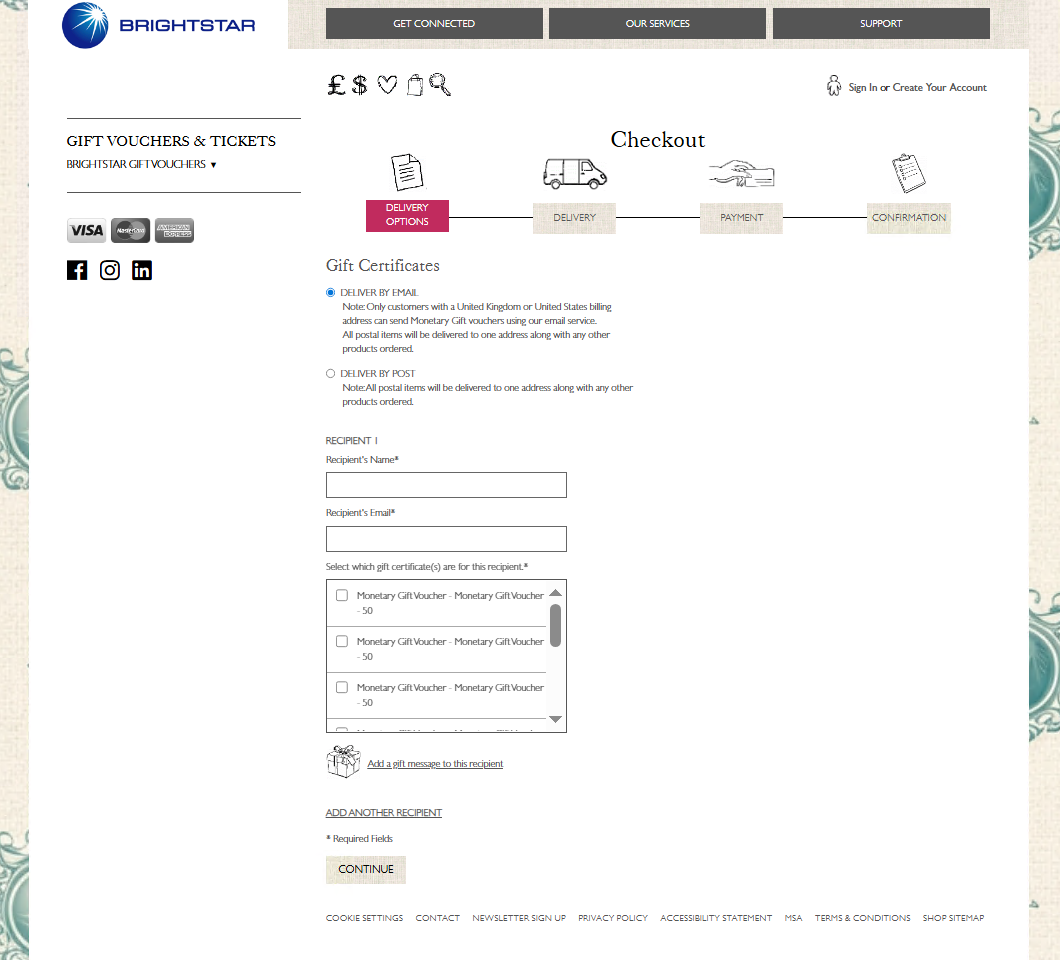
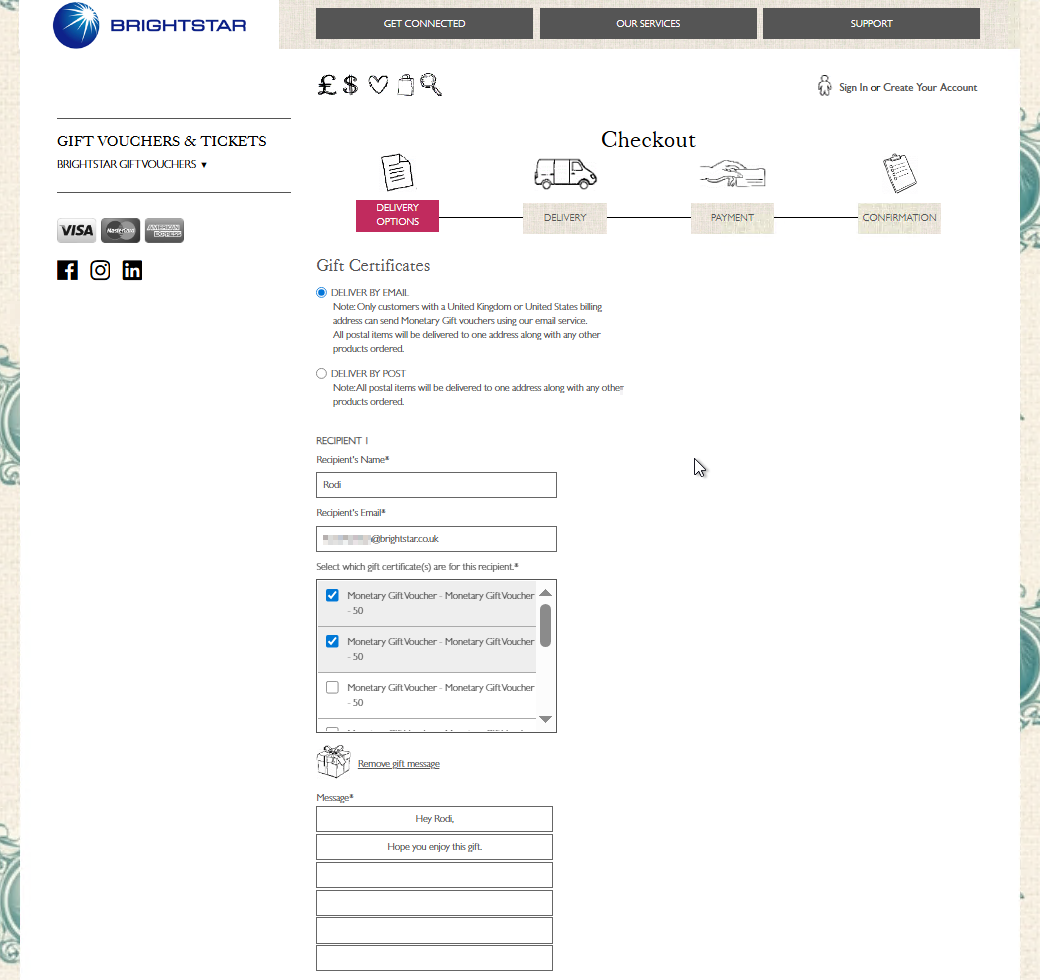
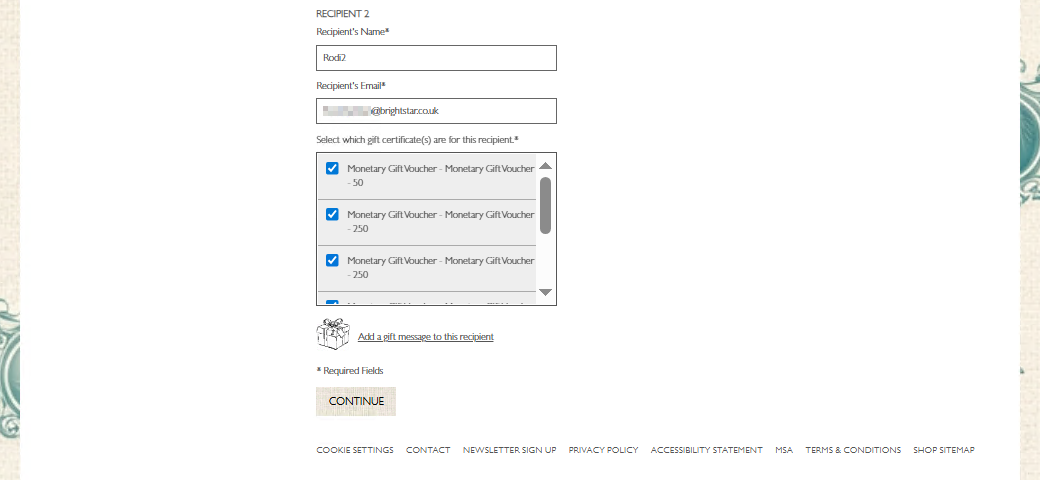
At checkout, customers will first see the delivery options page. Here they can choose whether they would like their vouchers delivered by email or by post. They can enter each recipient's name and email address, assign vouchers to each recipient, add individual gift messages, and add additional recipients if needed.
All vouchers must be assigned to a recipient before the customer may continue. Up to fifteen recipients can be added, though this number can be adjusted according to business needs.
Once all required information is entered and every voucher is assigned, the customer may continue to the next step. If any fields are missing or incorrect while the customer attempts to continue an error message will appear explaining what needs to be corrected before they can proceed.
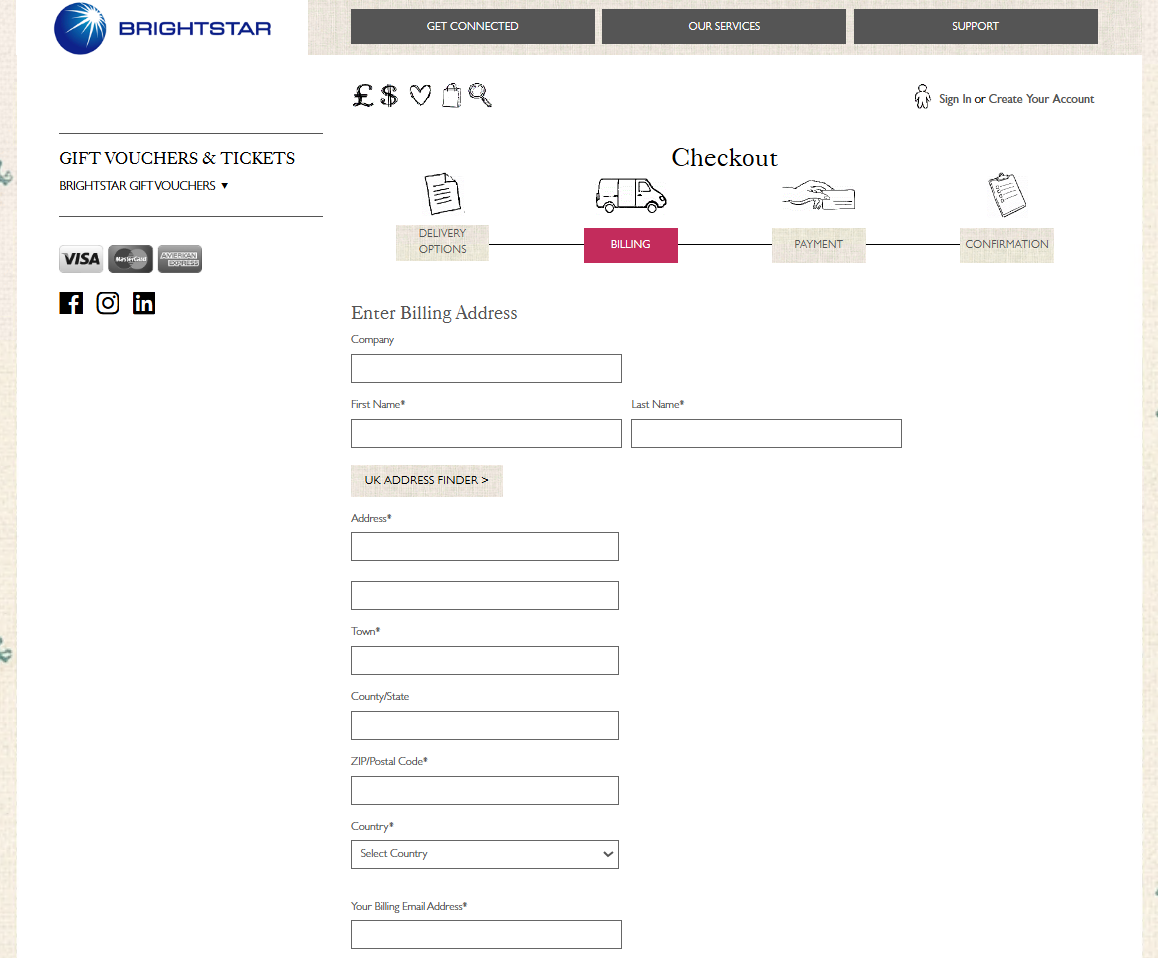
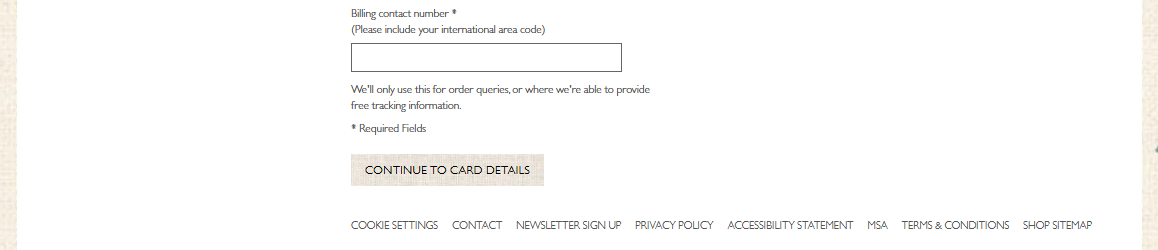
On the billing page, the customer must enter their billing address. This is required even for email delivery to prevent fraud and ensure customer safety.
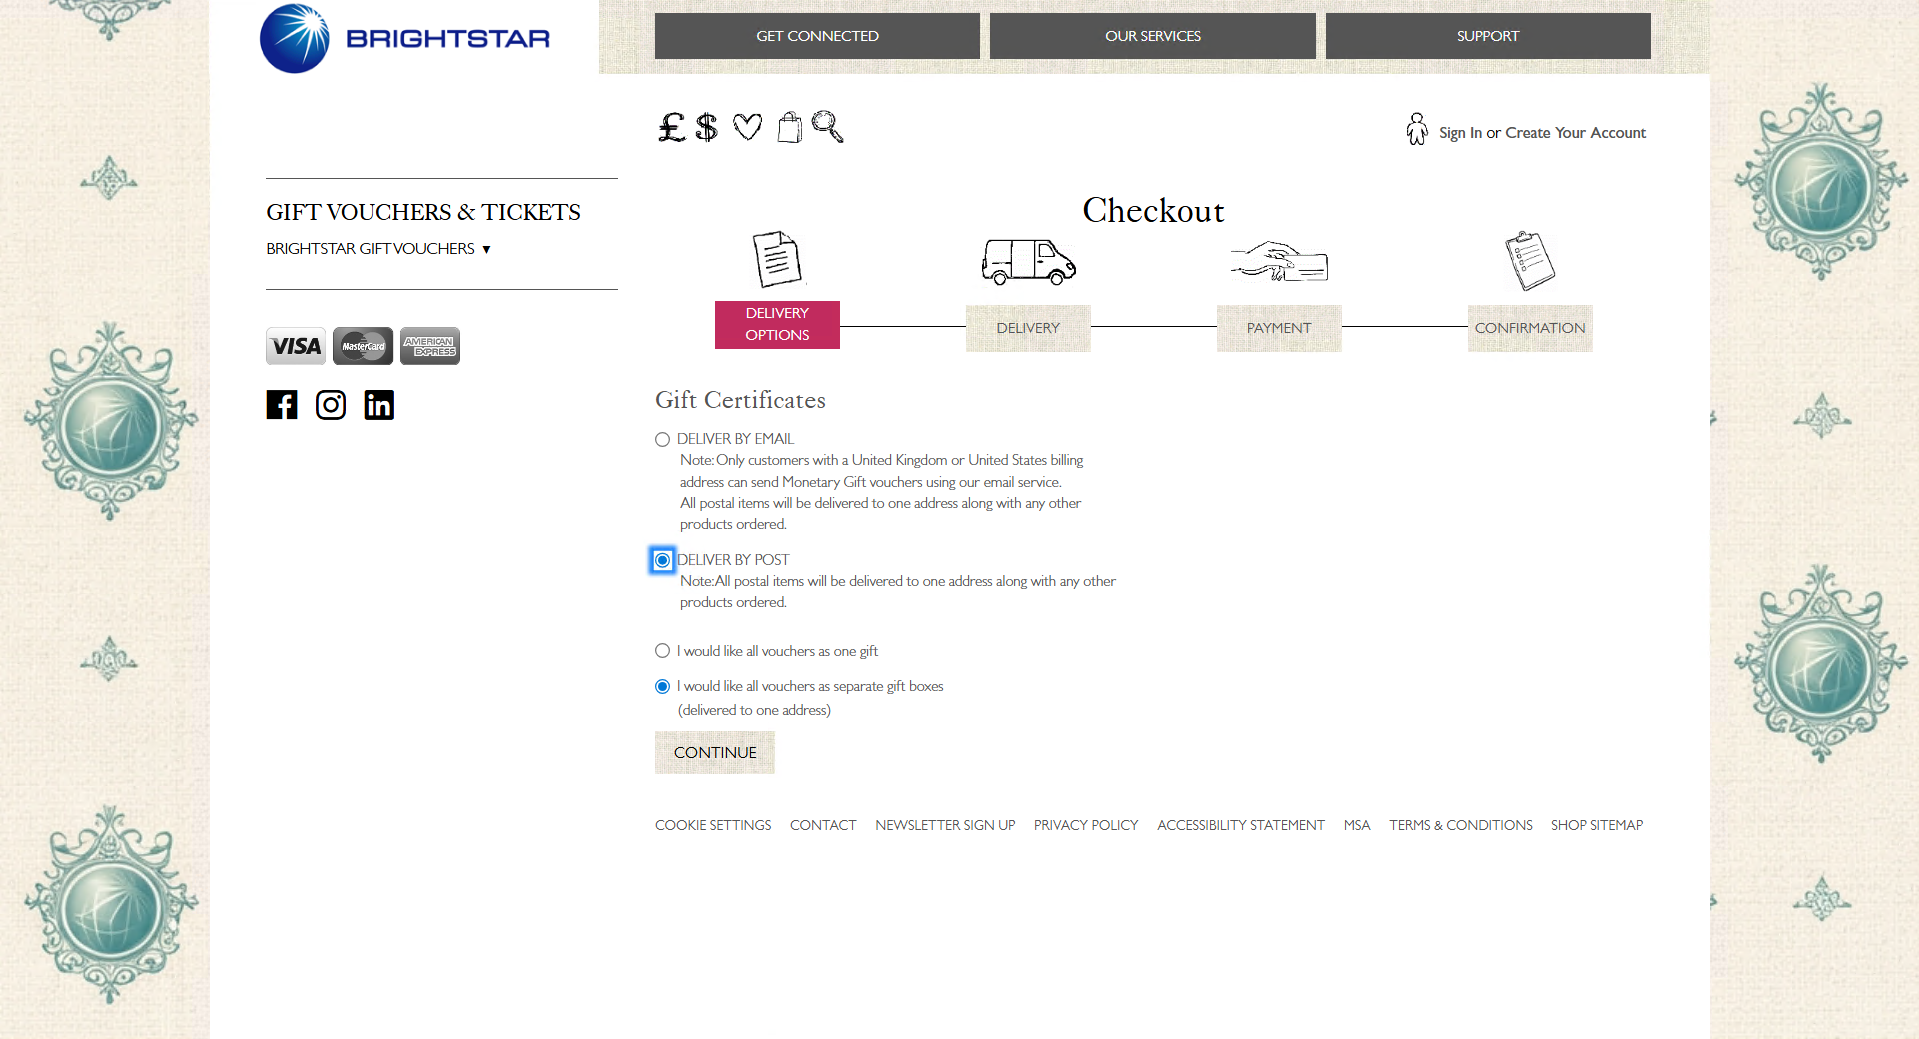
Going back to the checkout page, if the customer decided to proceed with postal delivery, they can choose whether all vouchers should arrive as one gift or in individual gift boxes delivered to a single address.
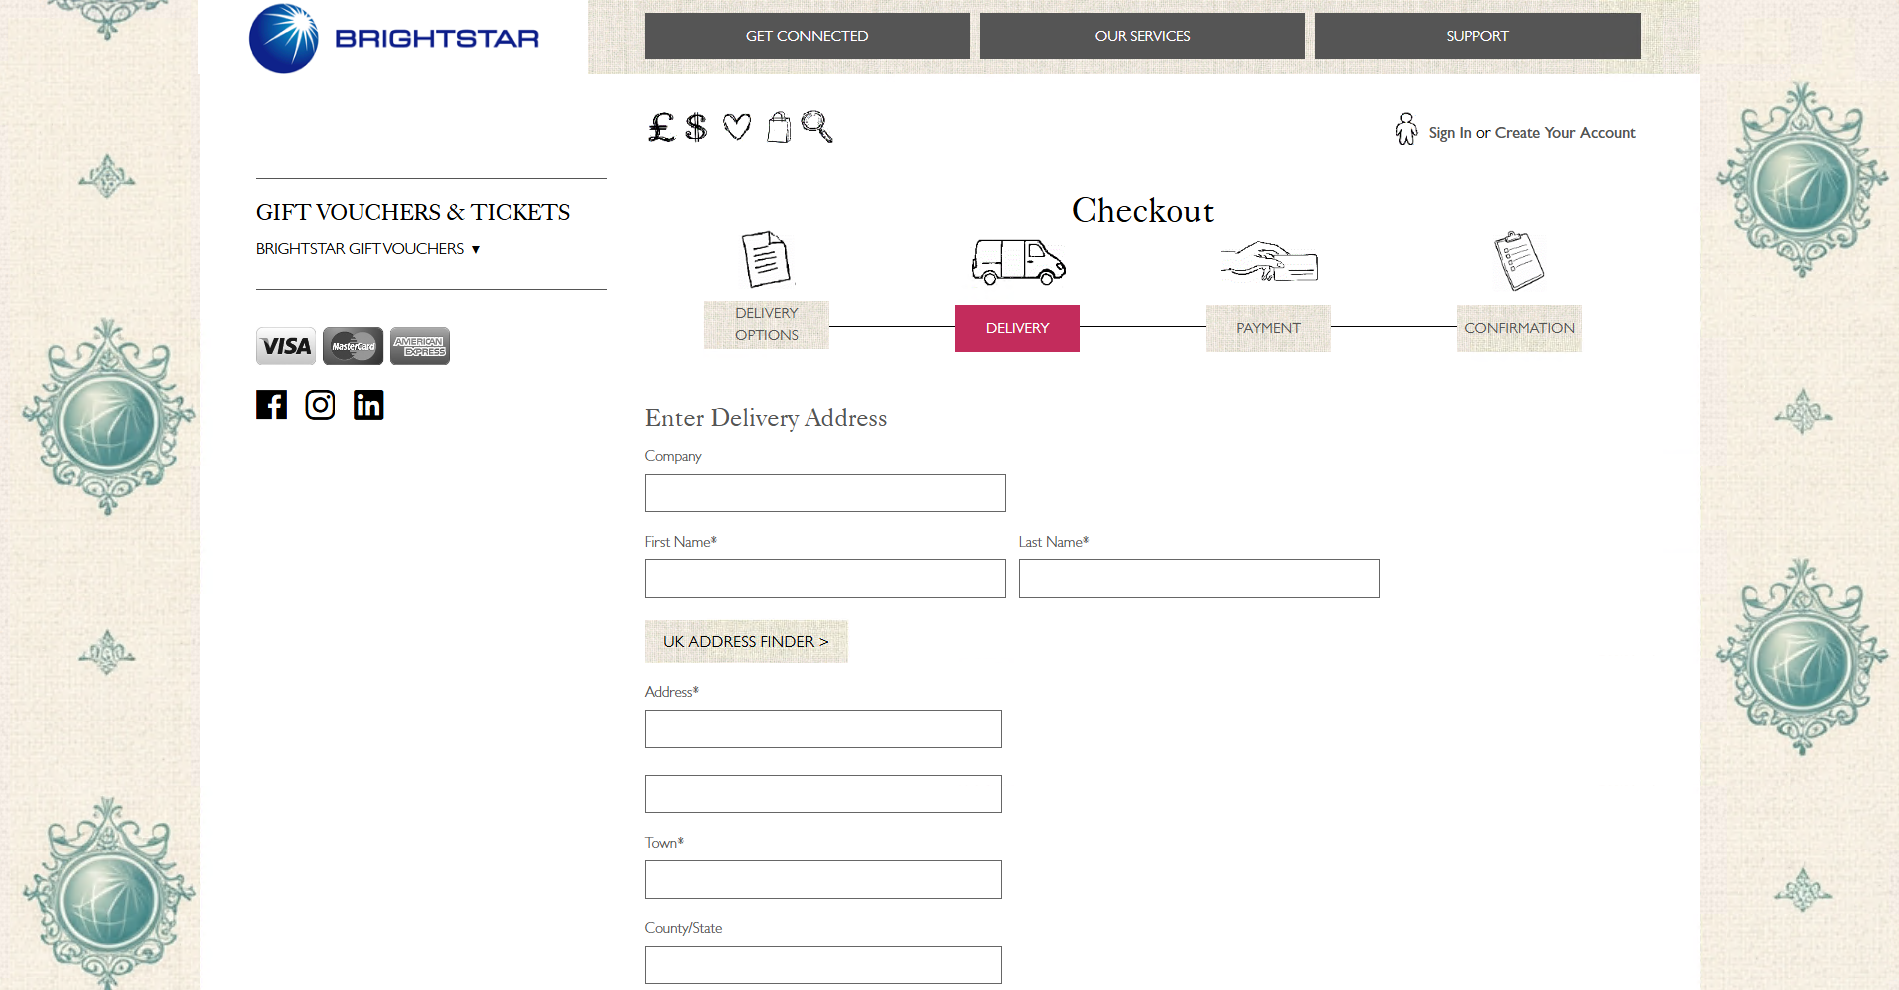
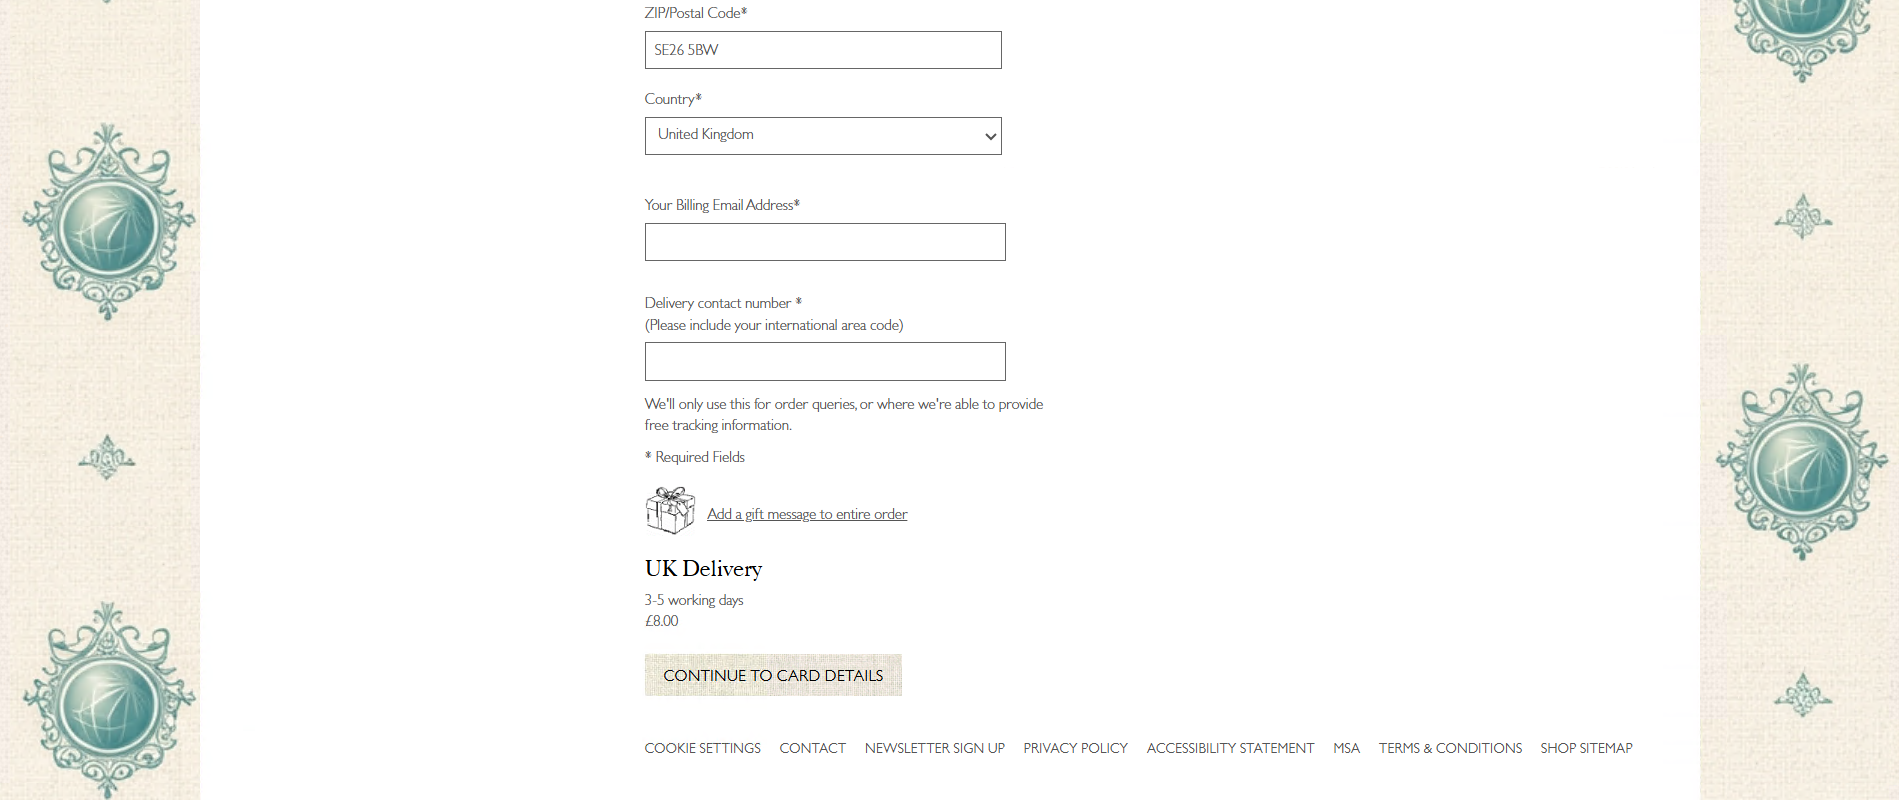
If postal delivery was selected, the customer must enter the delivery address details. They may also add a gift message for the entire order. Once "ZIP/Postal Code" section along with the "Country" section have been filled, the number of working days required for delivery and the delivery cost are clearly displayed.

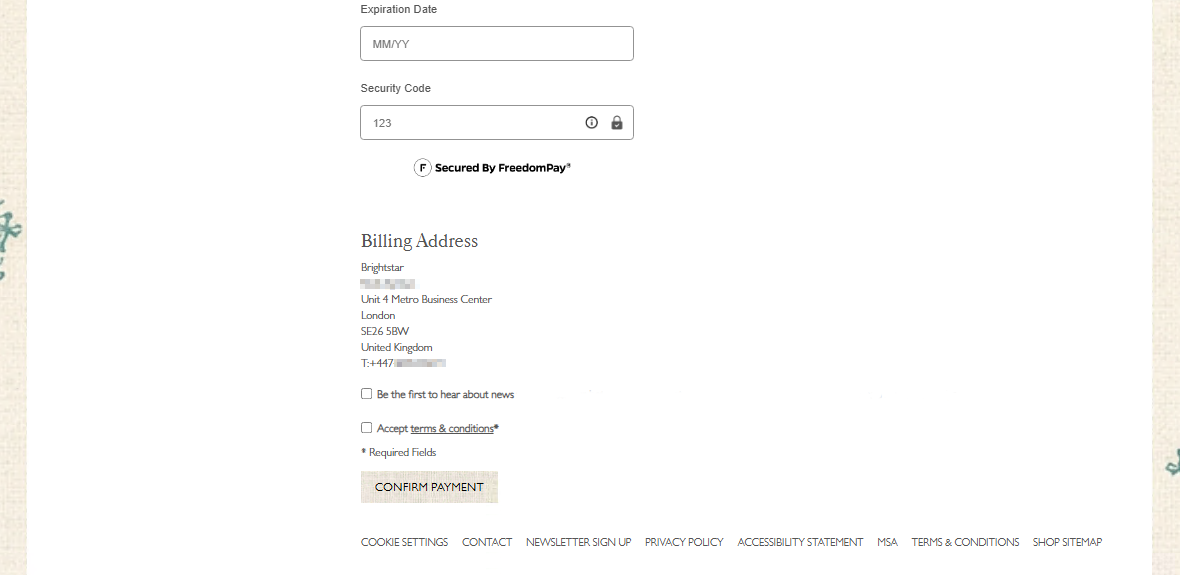
Once the details on the billing page have been confirmed for delivery by either email or post, and the user selects the “CONTINUE TO CARD DETAILS” button, they are taken to the payment page. Here, the user can review their order and enter their card details to pay and complete the transaction. Users may also select the “EDIT DELIVERY OPTIONS” button to return to the delivery options page if any errors need correcting. After ensuring all information is accurate, and once they have read and accepted the terms & conditions via the link within the “Accept terms & conditions*” checkbox, users can complete their transaction by clicking the “CONFIRM PAYMENT” button, which will then redirect them to the payment confirmation page.
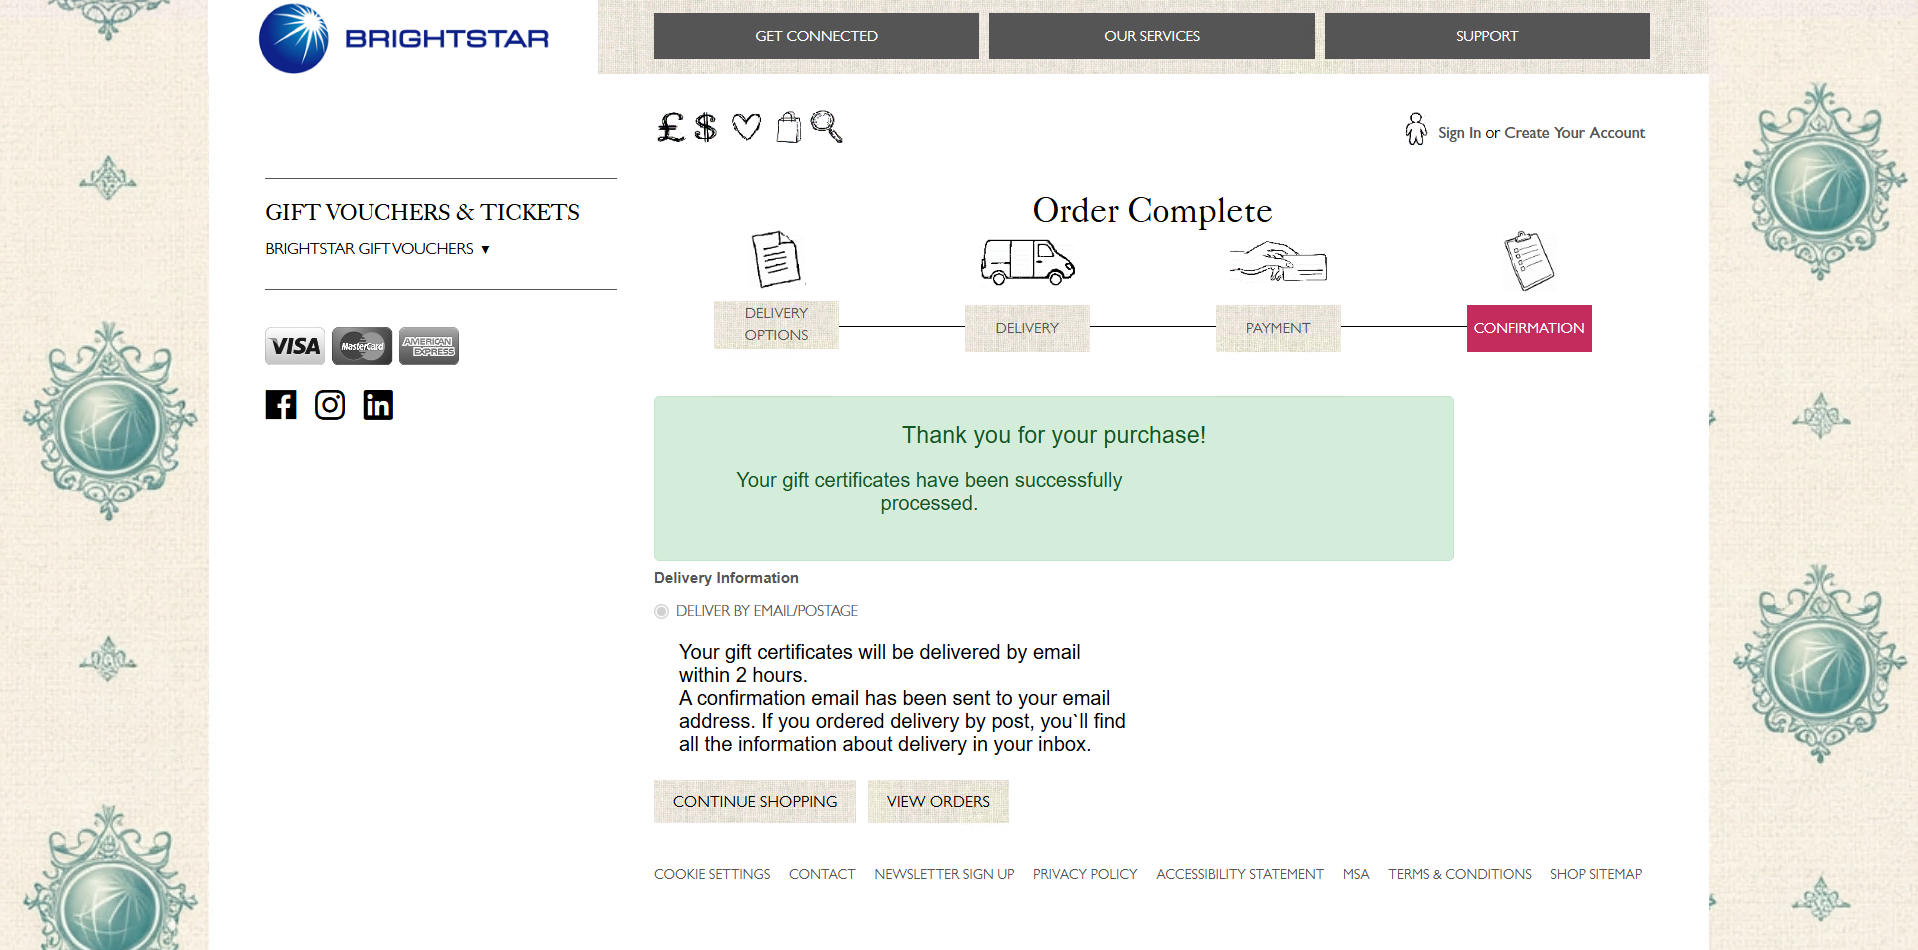
Once the customer has clicked “CONFIRM PAYMENT”, they are redirected to the final payment confirmation page.
Staff Facing User Interface
Redeeming vouchers:
Once a customer is ready to pay and complete the transaction, the data moves into Umbraco Commerce where everything related to the payment, shipping information, billing details, and customer data is stored and managed. This centralised handling reduces the risk of errors and prevents issues from occurring on the customer side.
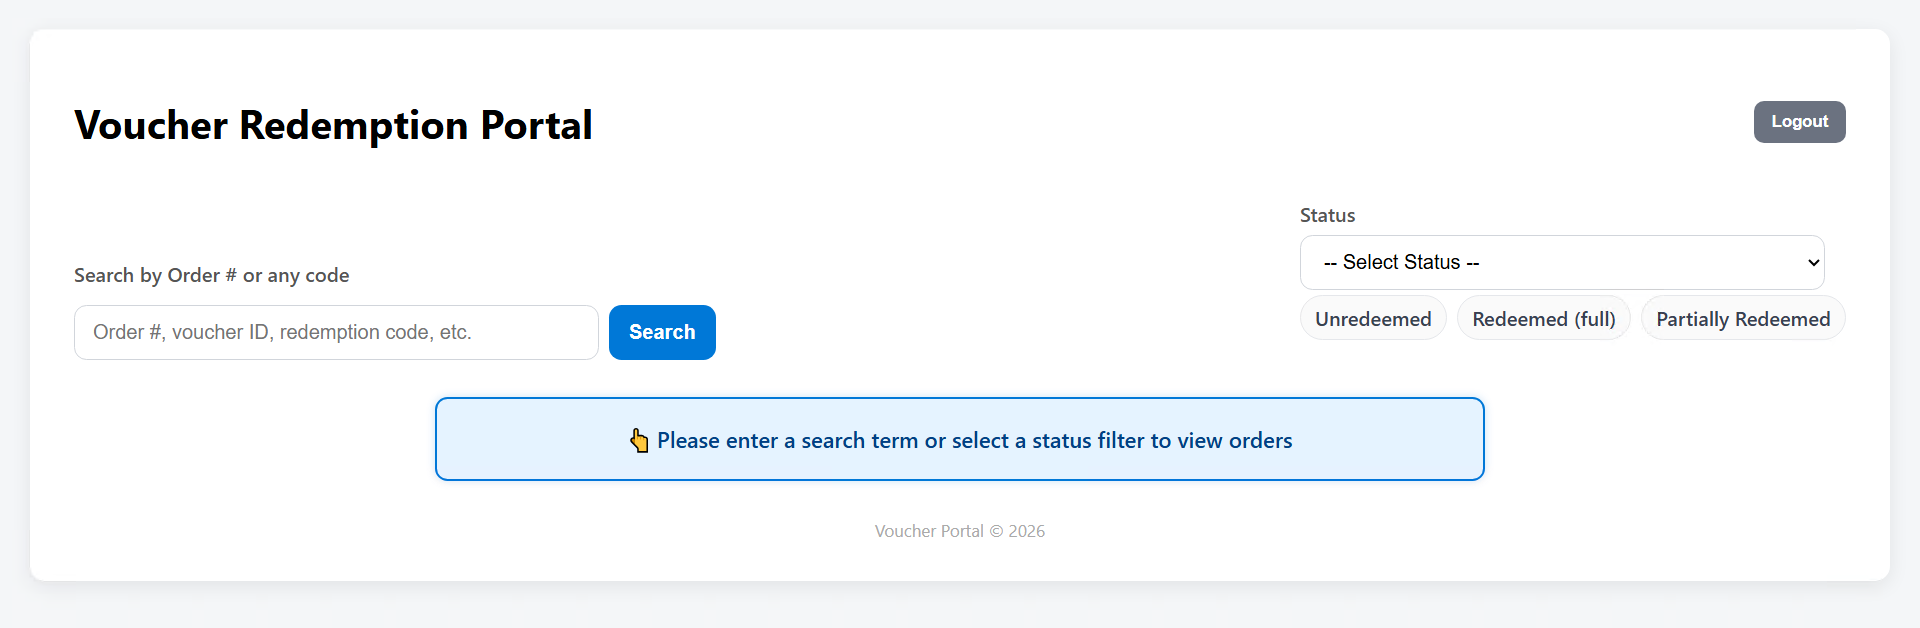
As a staff member, users of the Voucher Redemption Portal will first sign into their account. Once logged in, they will have access to a page where they can filter all order numbers by status or directly search for a voucher provided by the customer.
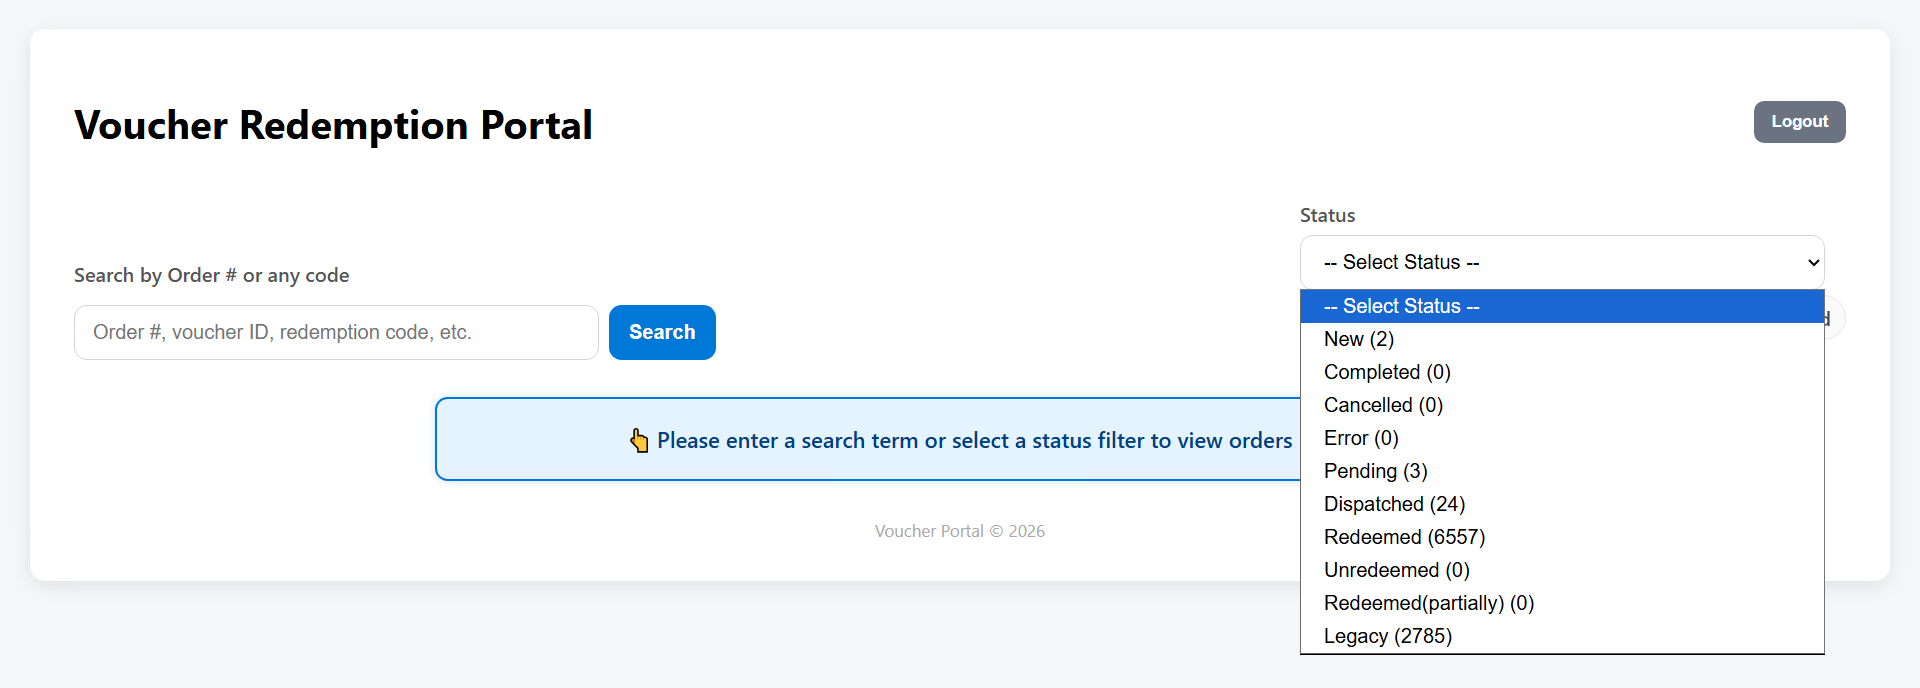
Each voucher order number has a single status assigned to it. Clicking on the “Select Status” bar reveals all available statuses that staff can use to filter voucher orders.
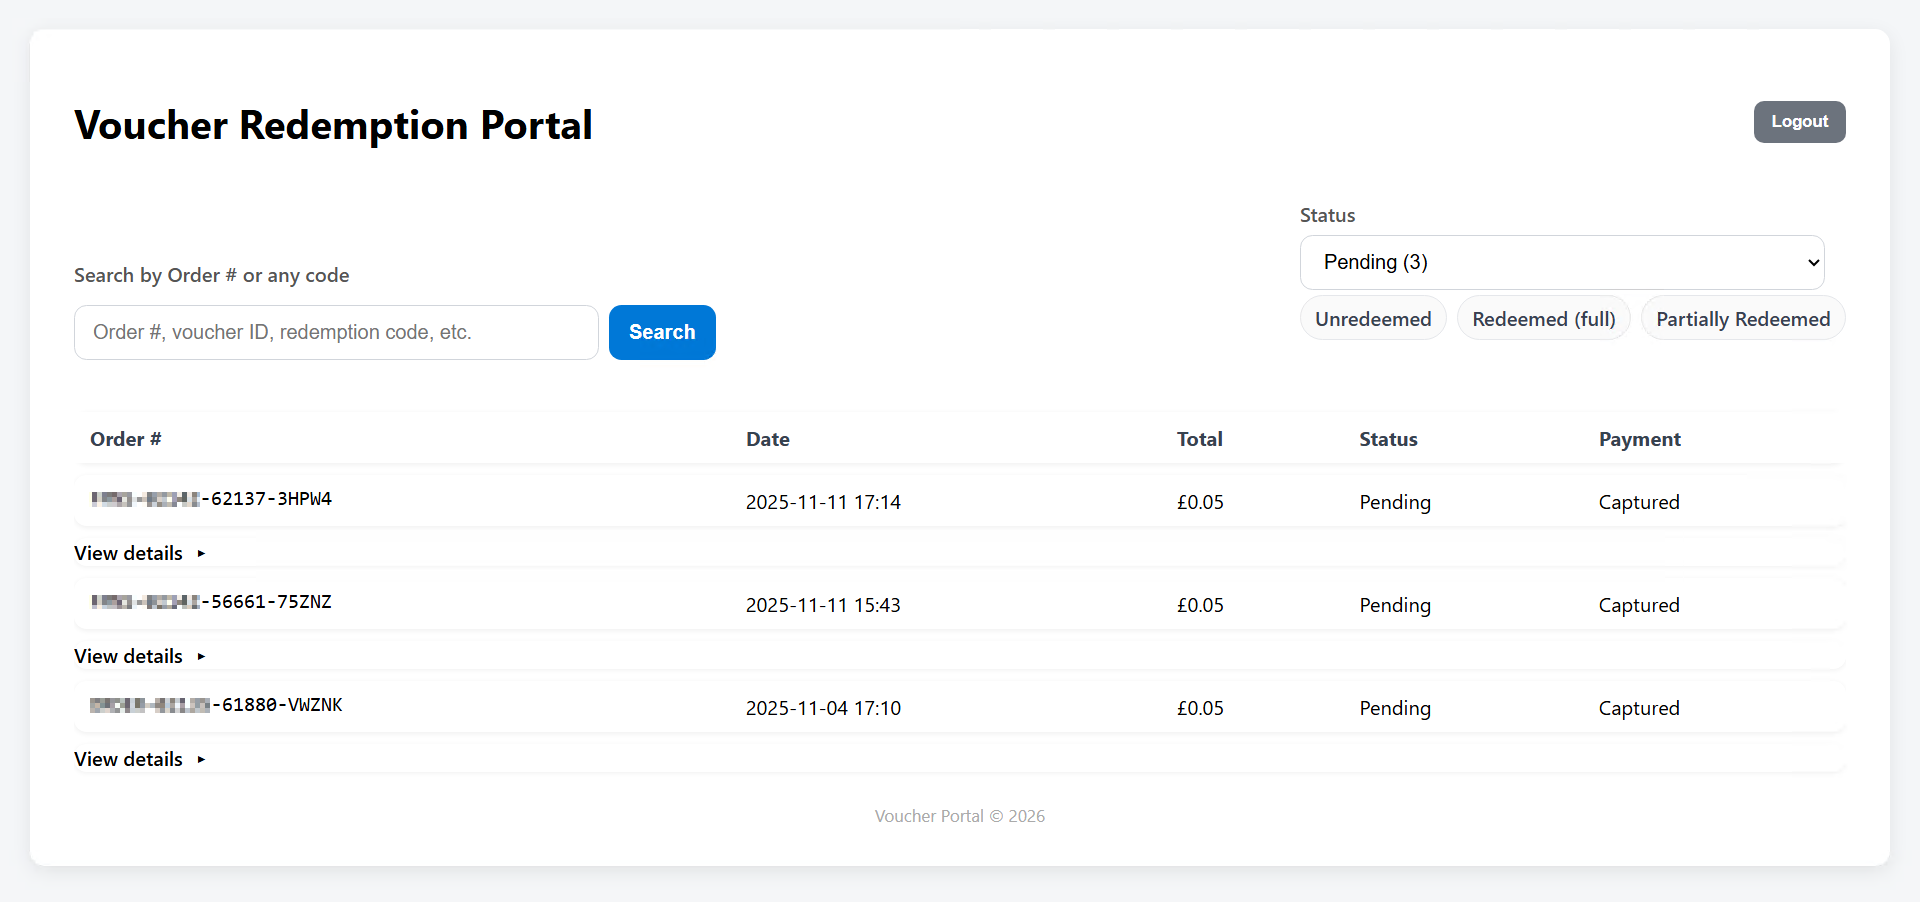
When a status is selected, all voucher order numbers assigned with that status are automatically displayed. For security reasons, parts of each order number may be struck through. These correspond to voucher orders, and each order may contain multiple redeemable voucher codes, each distinguished by an extension code.
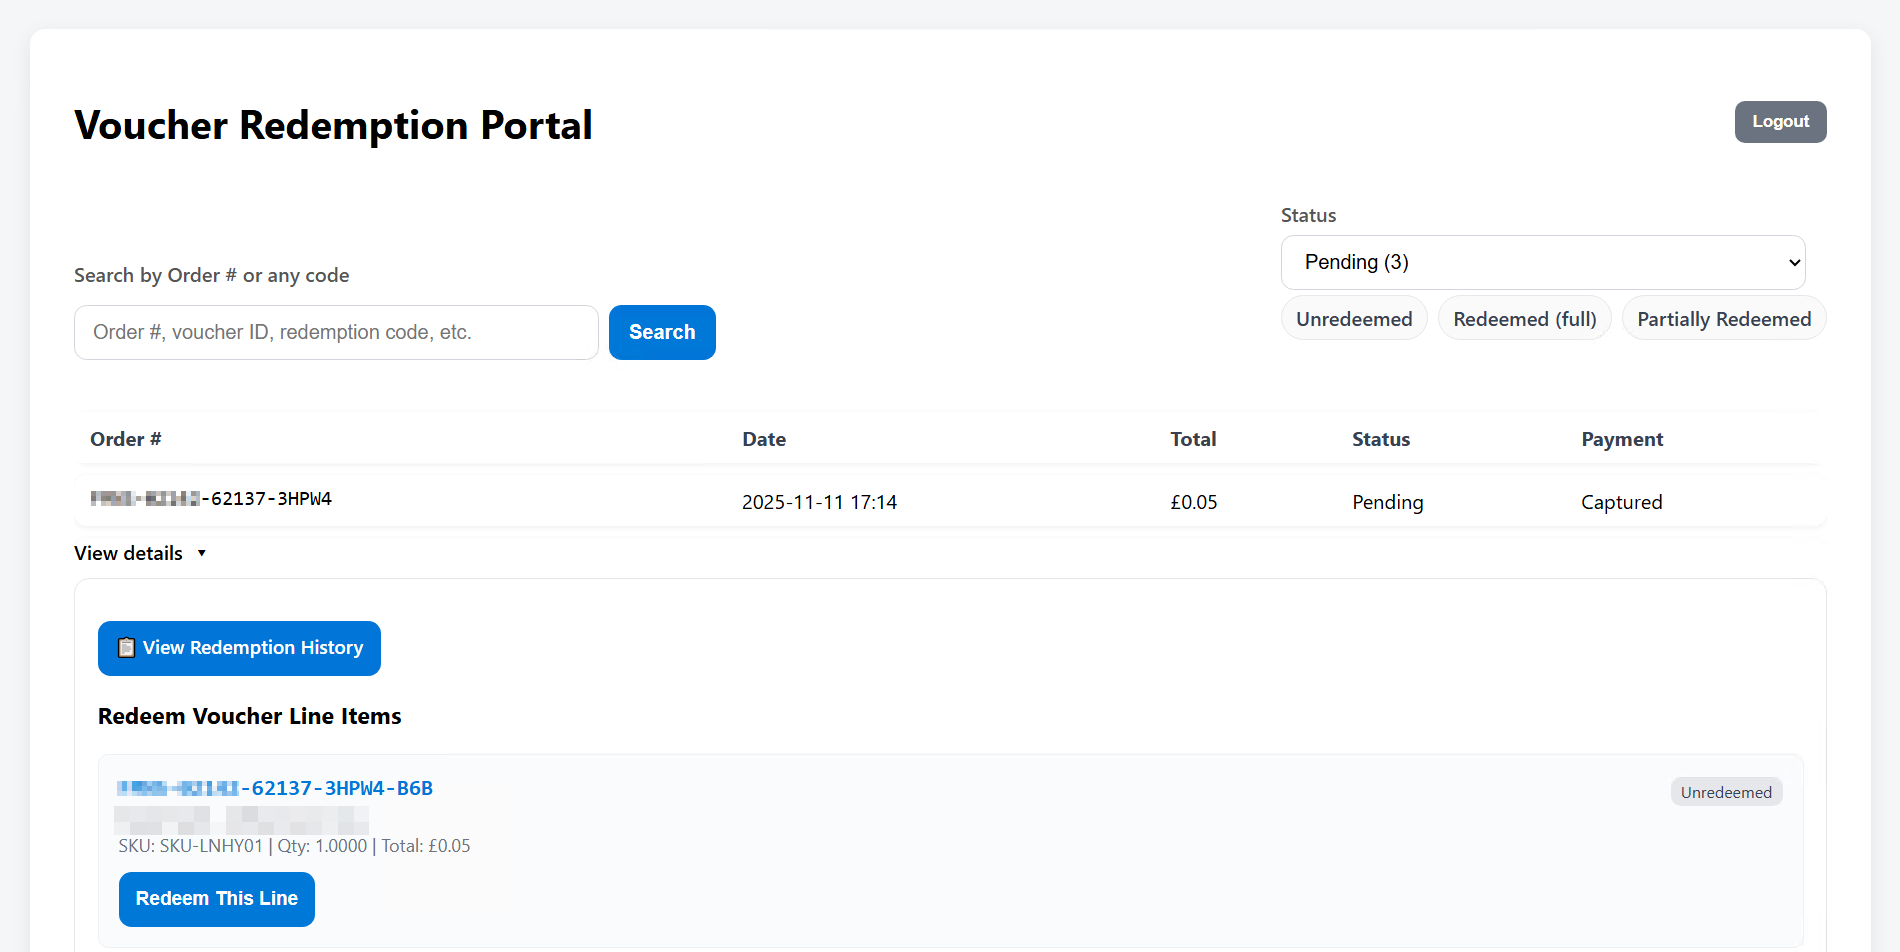
To redeem vouchers under an order, a staff member clicks the “View details” button for the order they would like to redeem from. This displays all voucher codes associated with that order. The staff member must then click “Redeem This Line” to redeem the specific voucher code presented by the customer. Redeeming a voucher invalidates it for any future use and updates the order status accordingly.
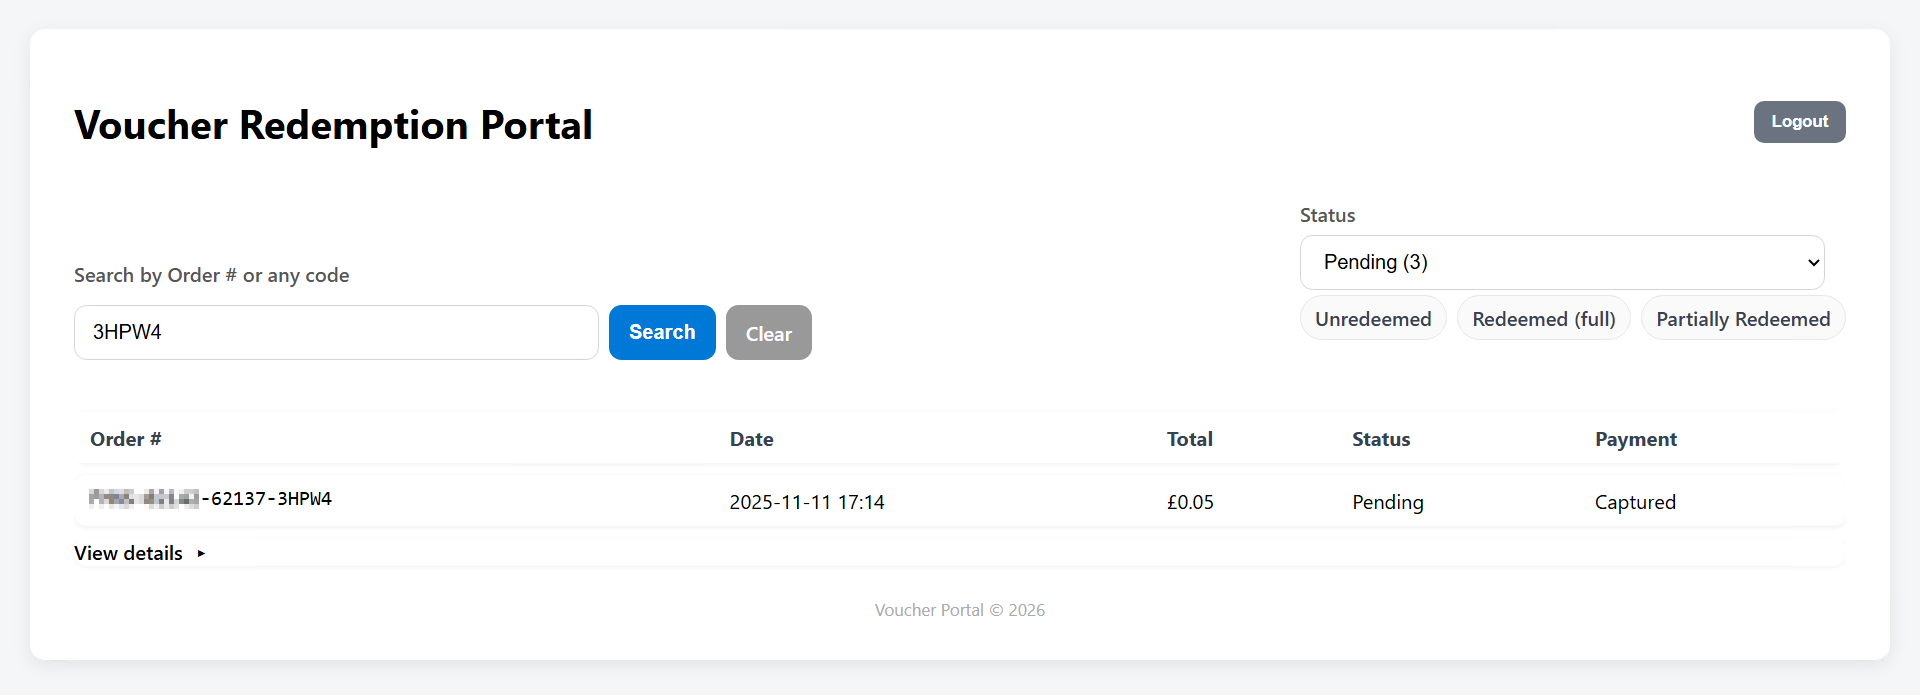
Staff can also search using the last five characters of a voucher code. This filters out all other orders and makes it easier to locate the specific order containing the voucher the customer wishes to redeem. After locating the order using this method, the staff member again clicks “View details” to access the voucher information.
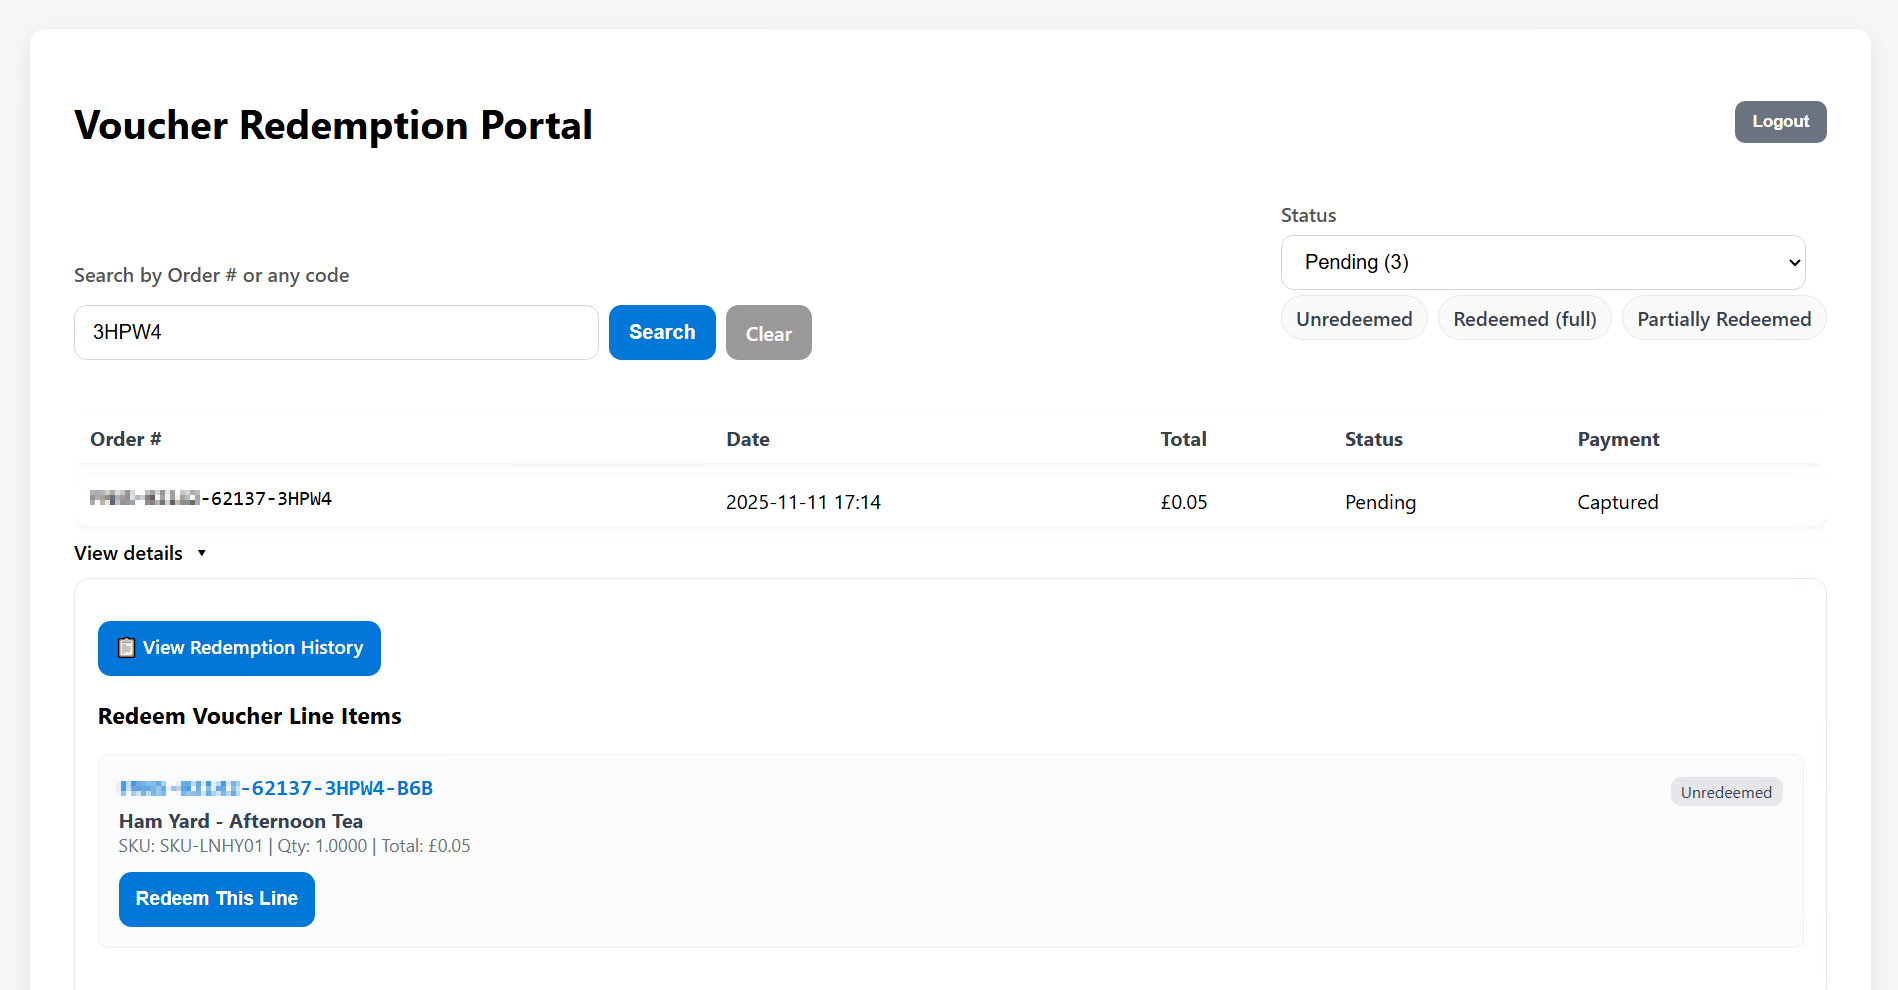
After clicking “View details”, the staff member will compare the customer's voucher to the voucher codes listed under the order. Once the correct voucher is identified, clicking “Redeem This Line” invalidates the voucher and updates the order status - for example, to "Partially Redeemed" if vouchers remain or to "Redeemed (full)" if all vouchers in the order have been redeemed.
Creating Vouchers:
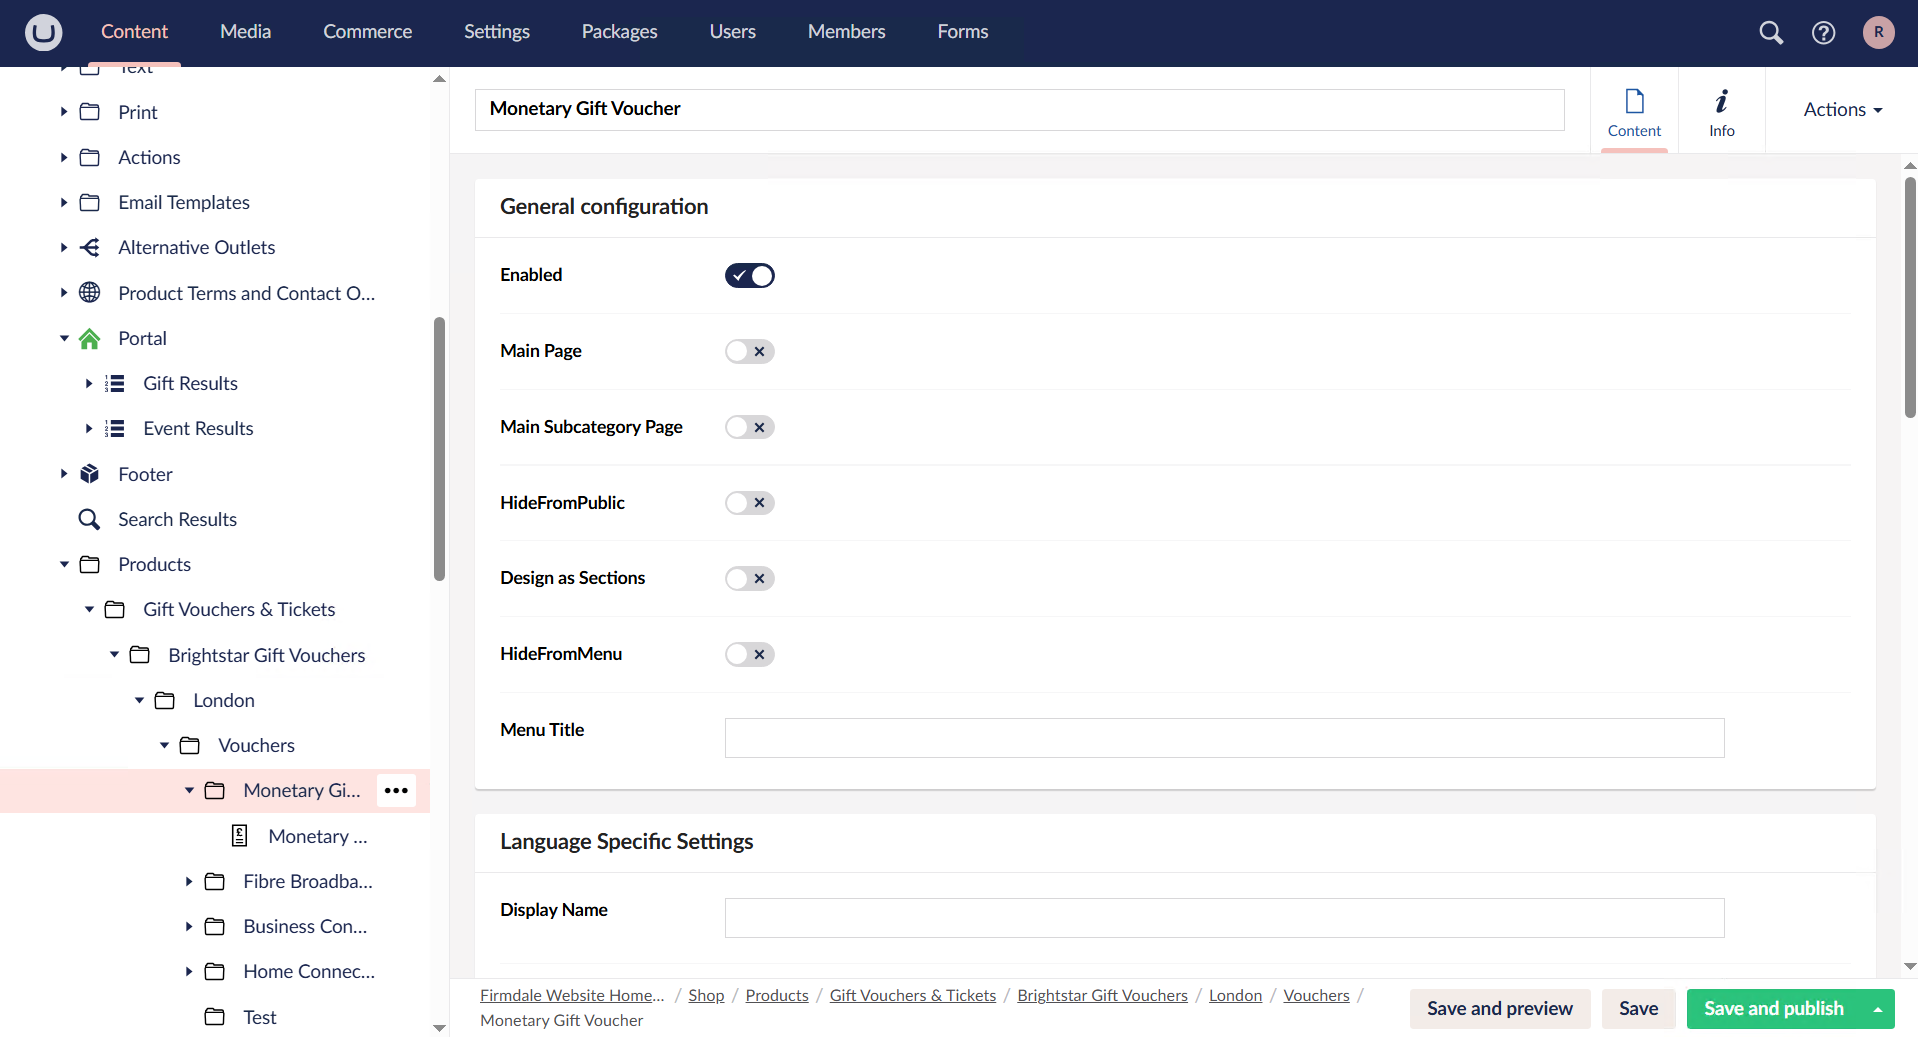
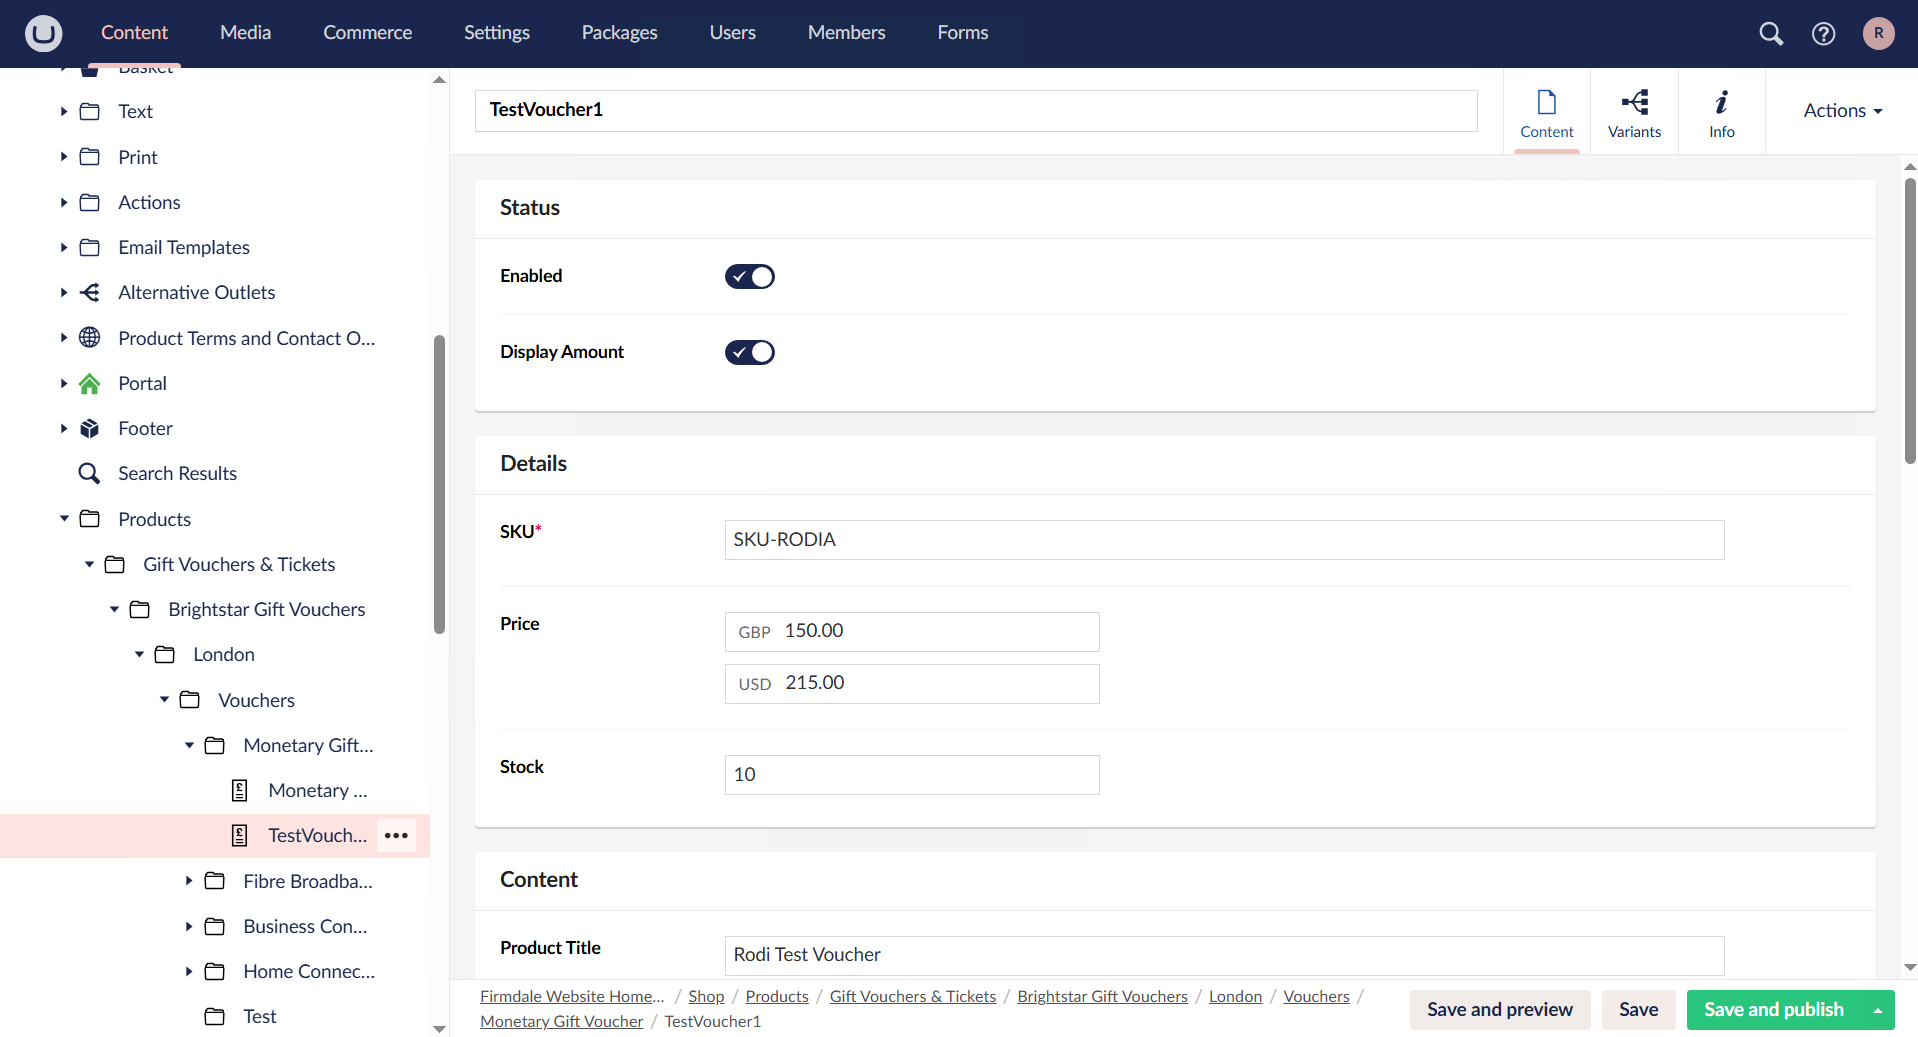
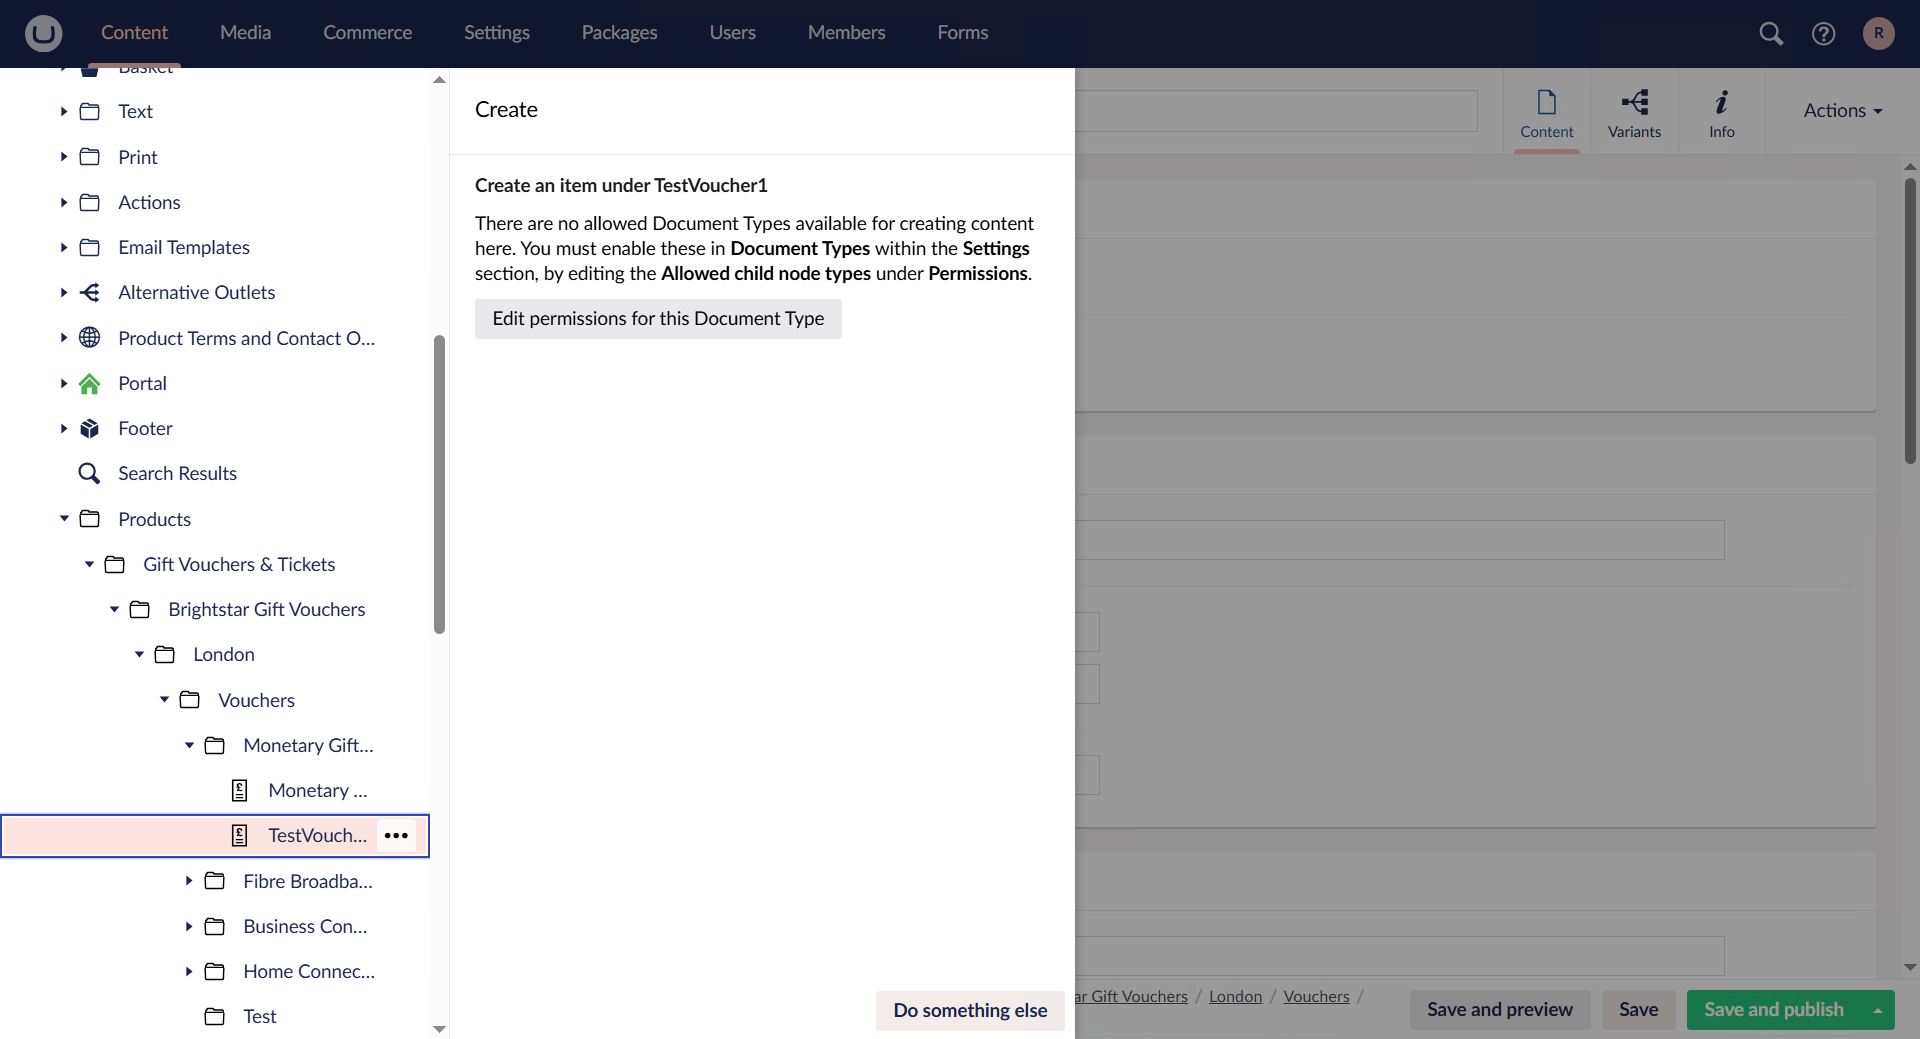
To create vouchers, the staff member must go to the Umbraco Backoffice and navigate to the Content section, which can be accessed from the navigation bar. From there, the staff member must locate the folder where vouchers are stored and click the button with three dots next to the folder name.
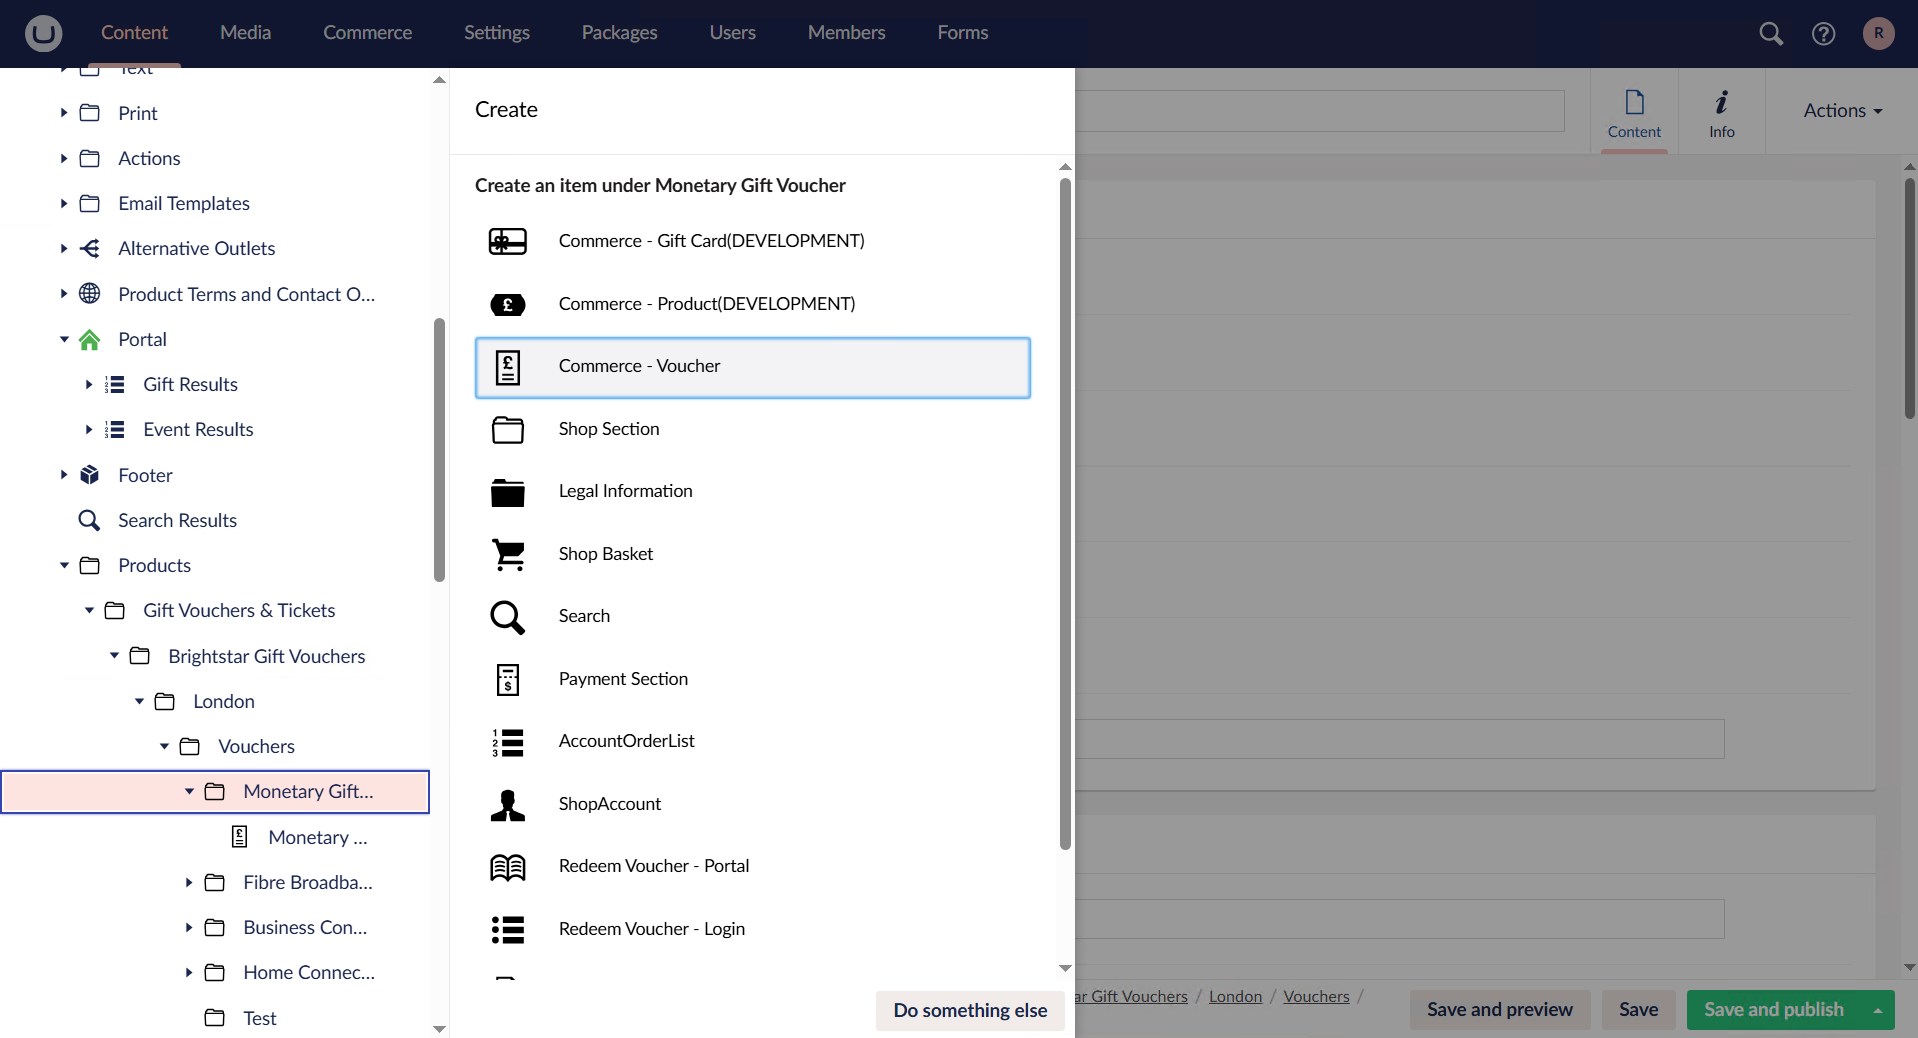
Once the staff member clicks the specified button, a popup containing several options will appear. To create a new voucher, the staff member must select the “Commerce - Voucher” option.
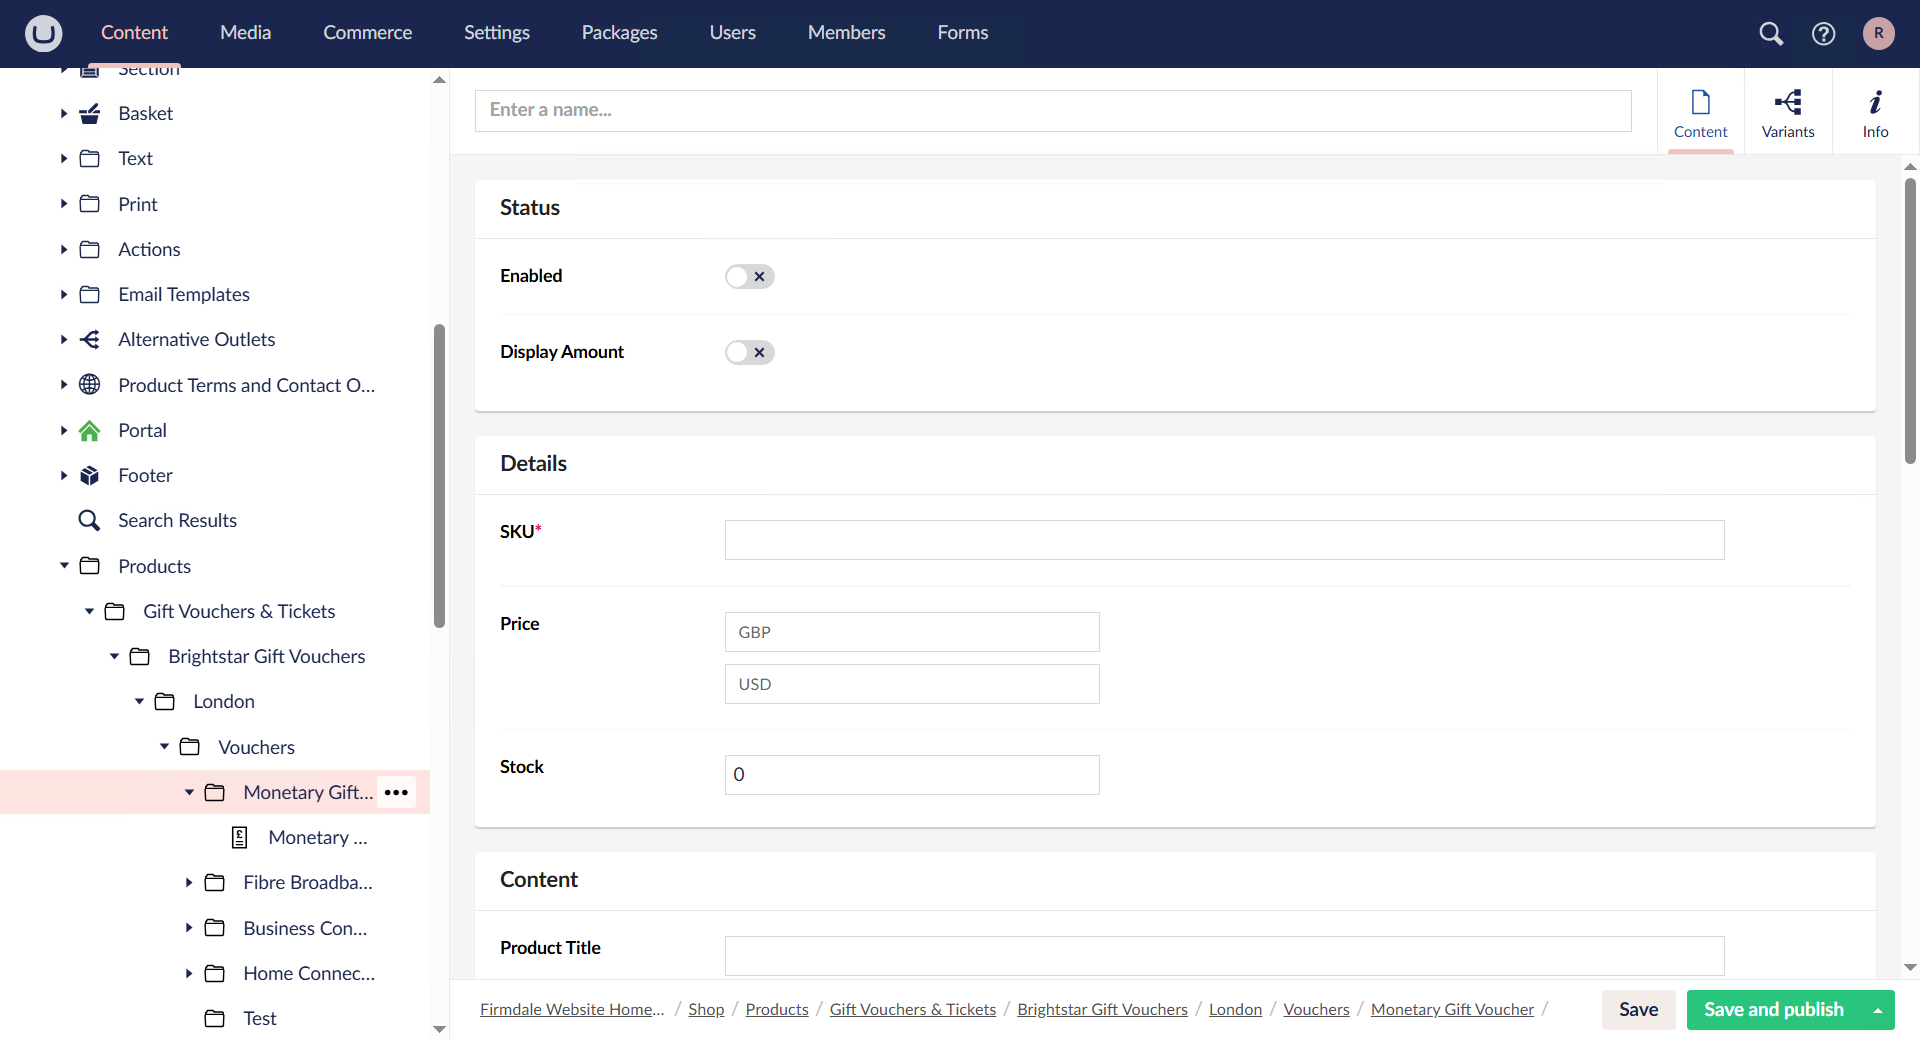
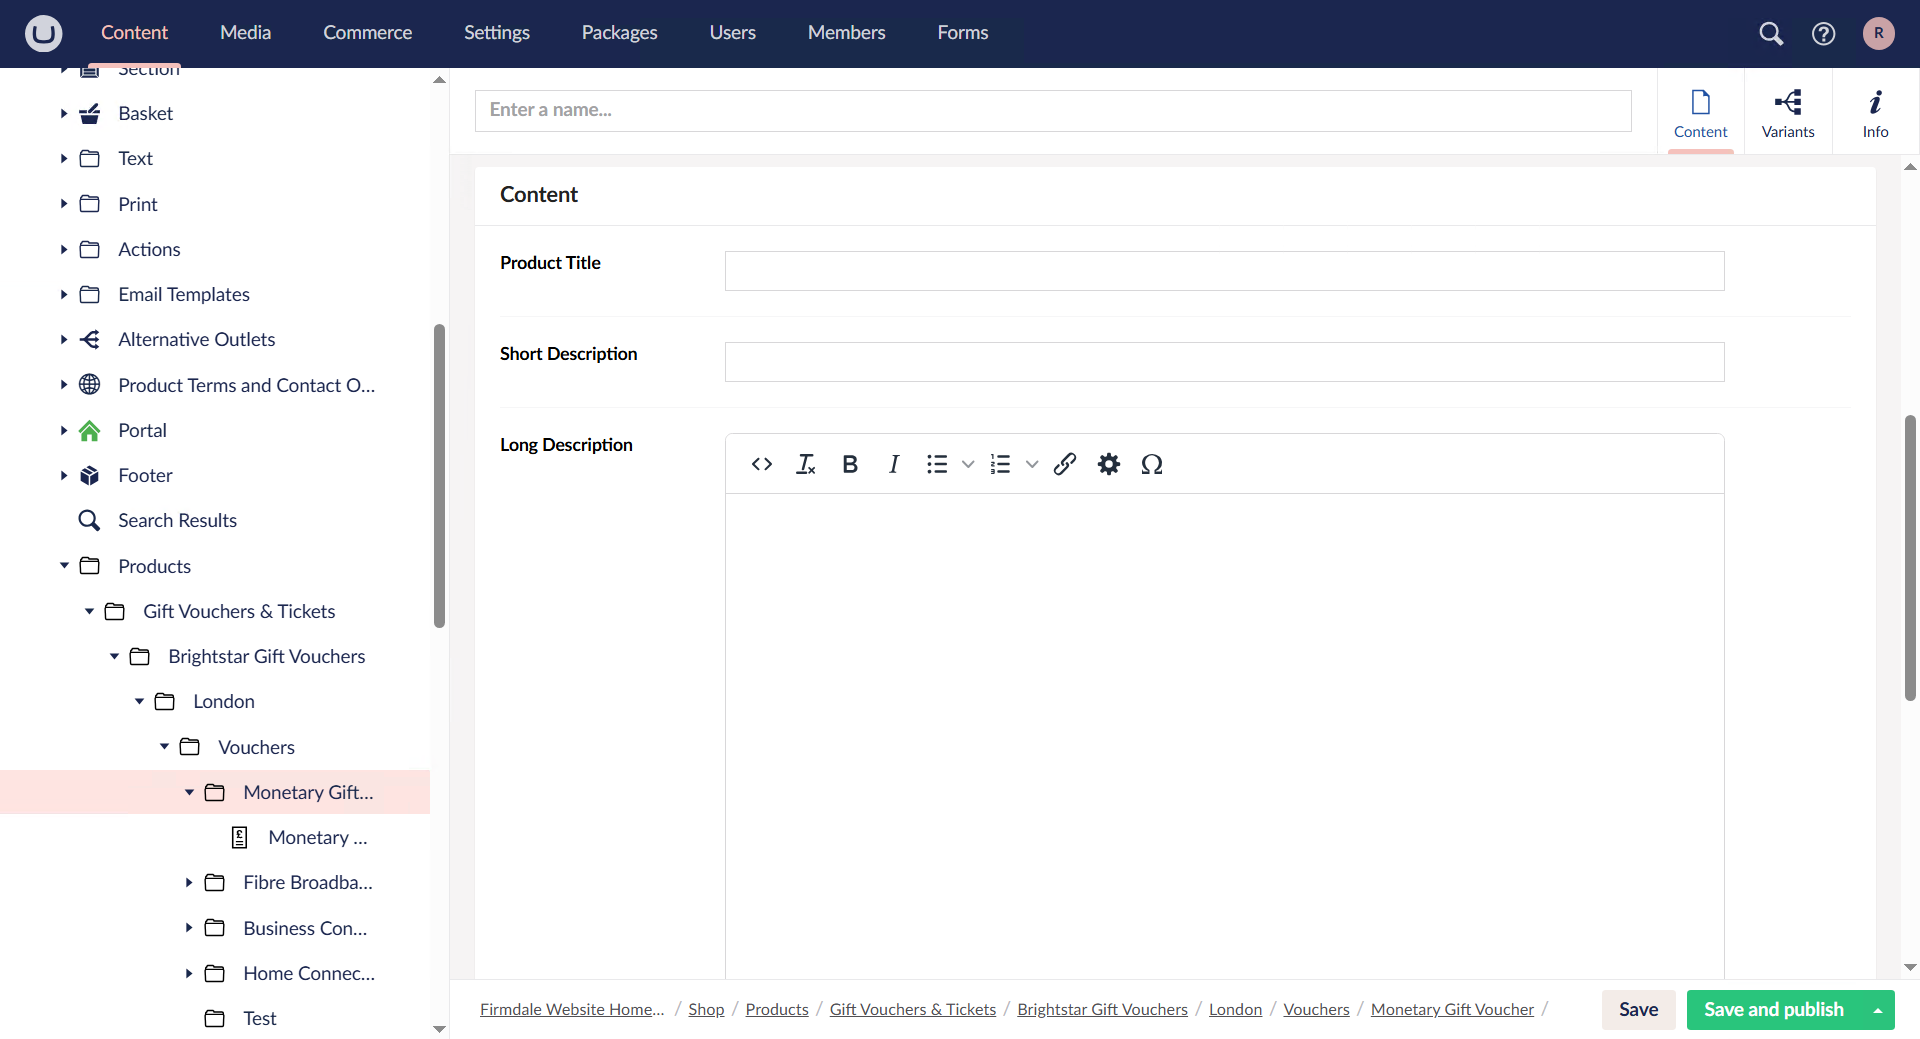
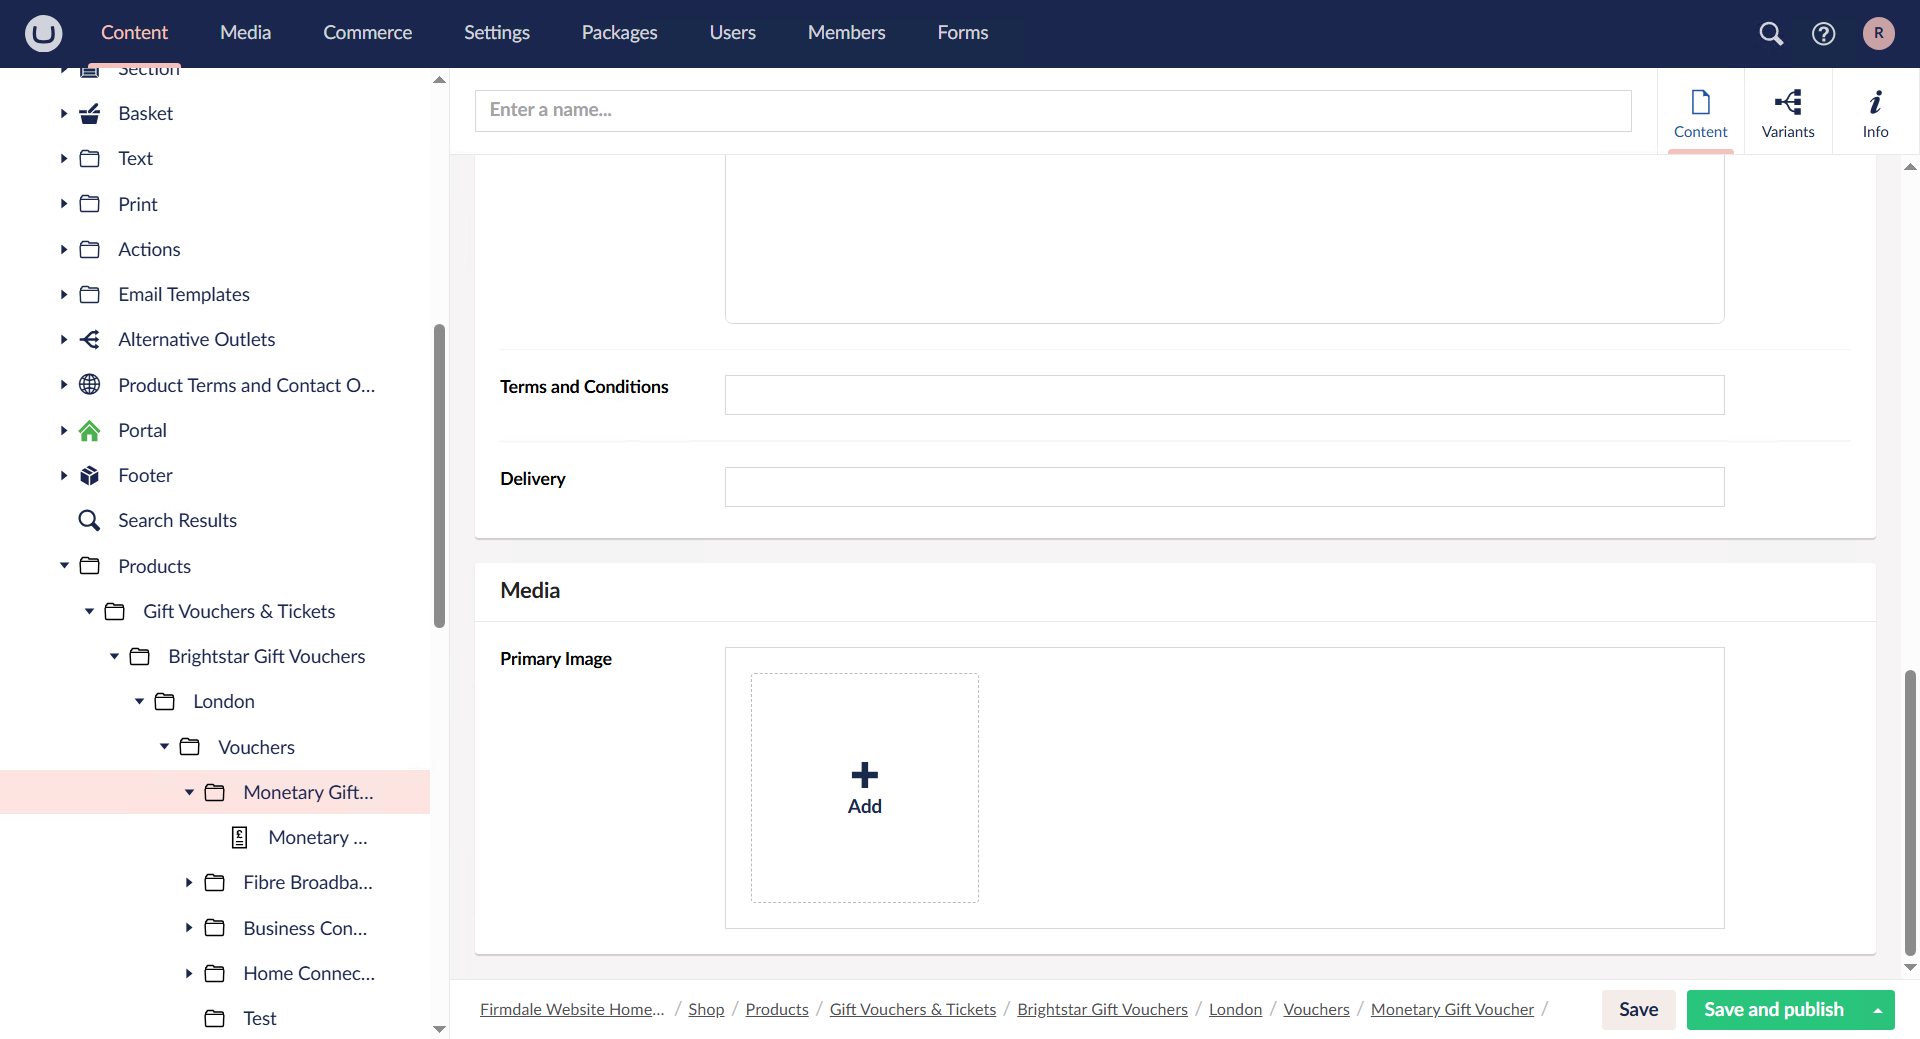
When this option is selected, a new page for creating vouchers will open. Here, the staff member must complete all required fields, while optional fields may also be filled in as needed. For fields such as Terms & Conditions or Delivery, preset values are available and can be inserted by entering the title of the file that contains those presets, making the process easier for staff. Once all necessary fields have been completed and reviewed, the staff member can click the green “Save and publish” button located at the bottom-right corner of the screen to save and publish the new voucher on the website, where it will be immediately ready for use.
Once the “Save and publish” button has been clicked, refreshing the company webpage will display the newly created voucher, confirming that it is ready for use.
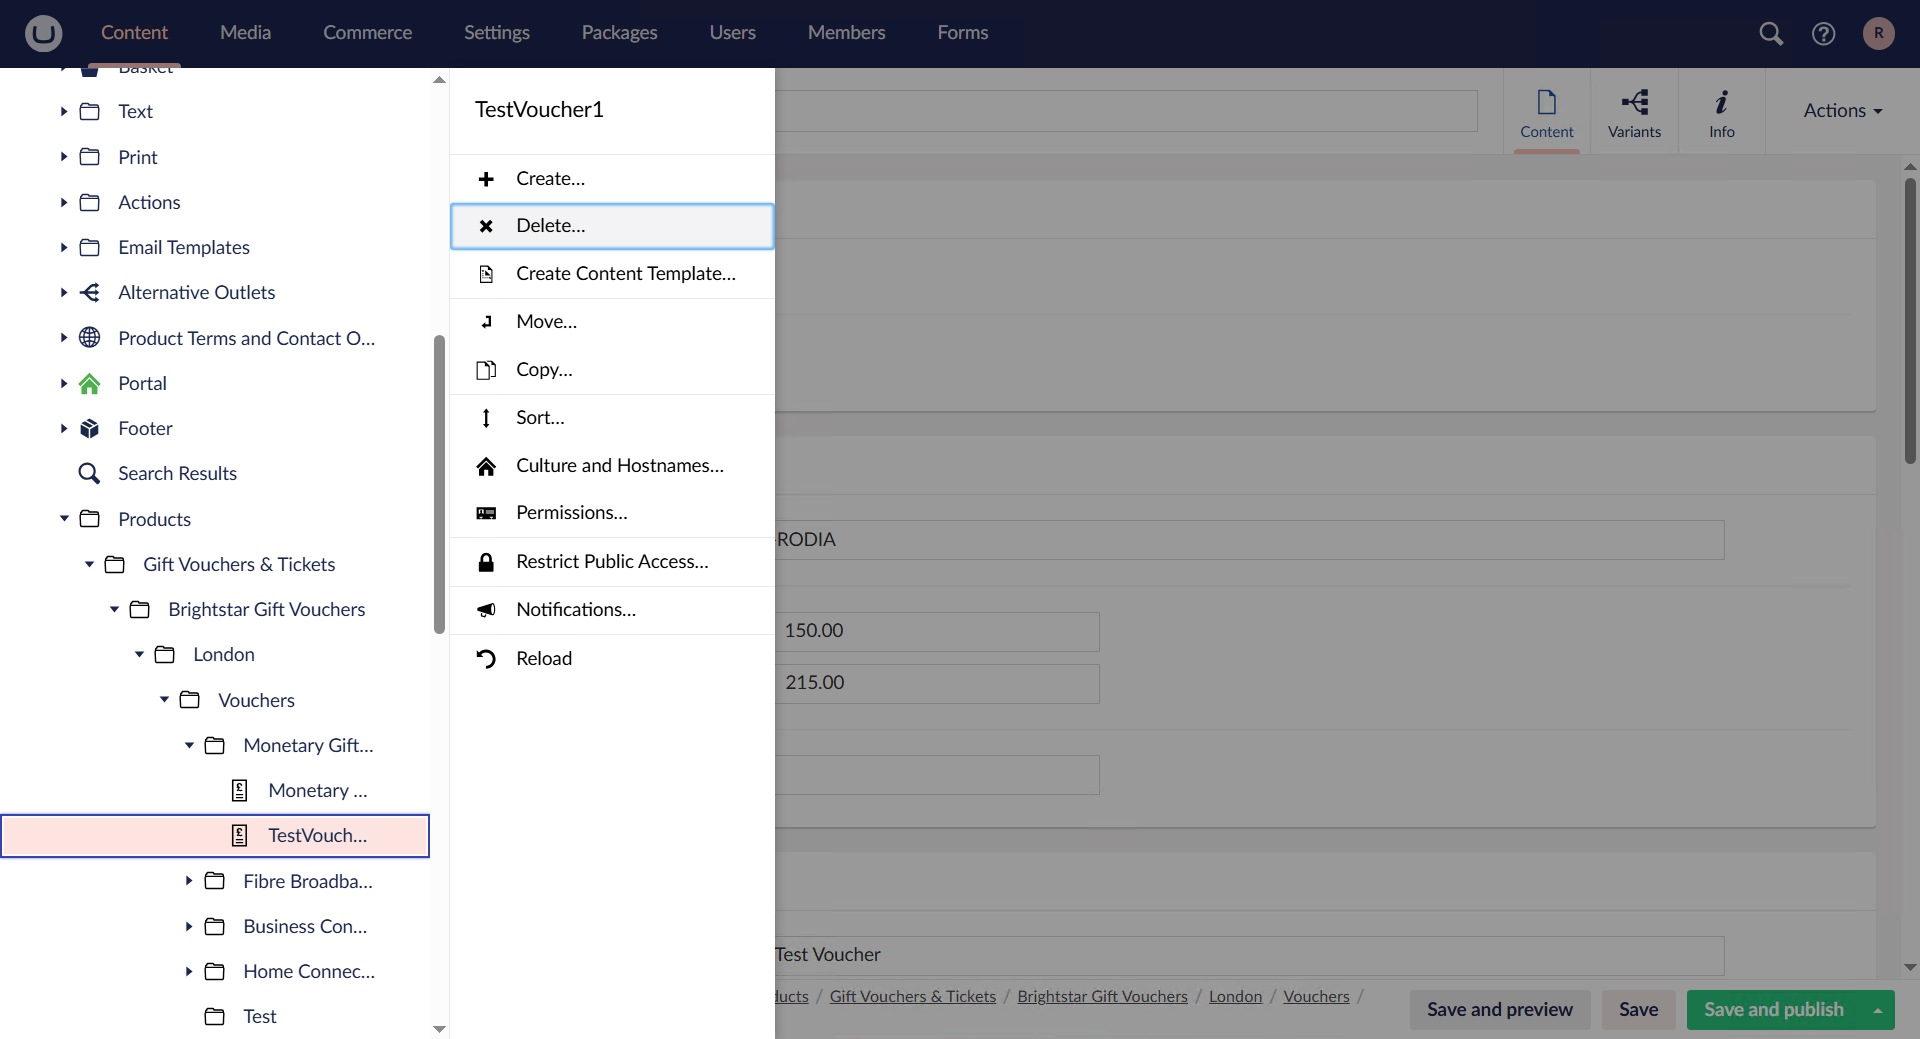
Deleting a voucher is just as straightforward. Return to the Umbraco Backoffice and locate the voucher you want to delete within the folder where vouchers are stored. Hover over it, then click the button with three dots next to the voucher's name.
After clicking the button with three dots, a popup will appear, and the staff member must click the “Do something else” option.
Once the “Do something else” button has been clicked, another popup will appear containing a “Delete” button, which the staff member must select.
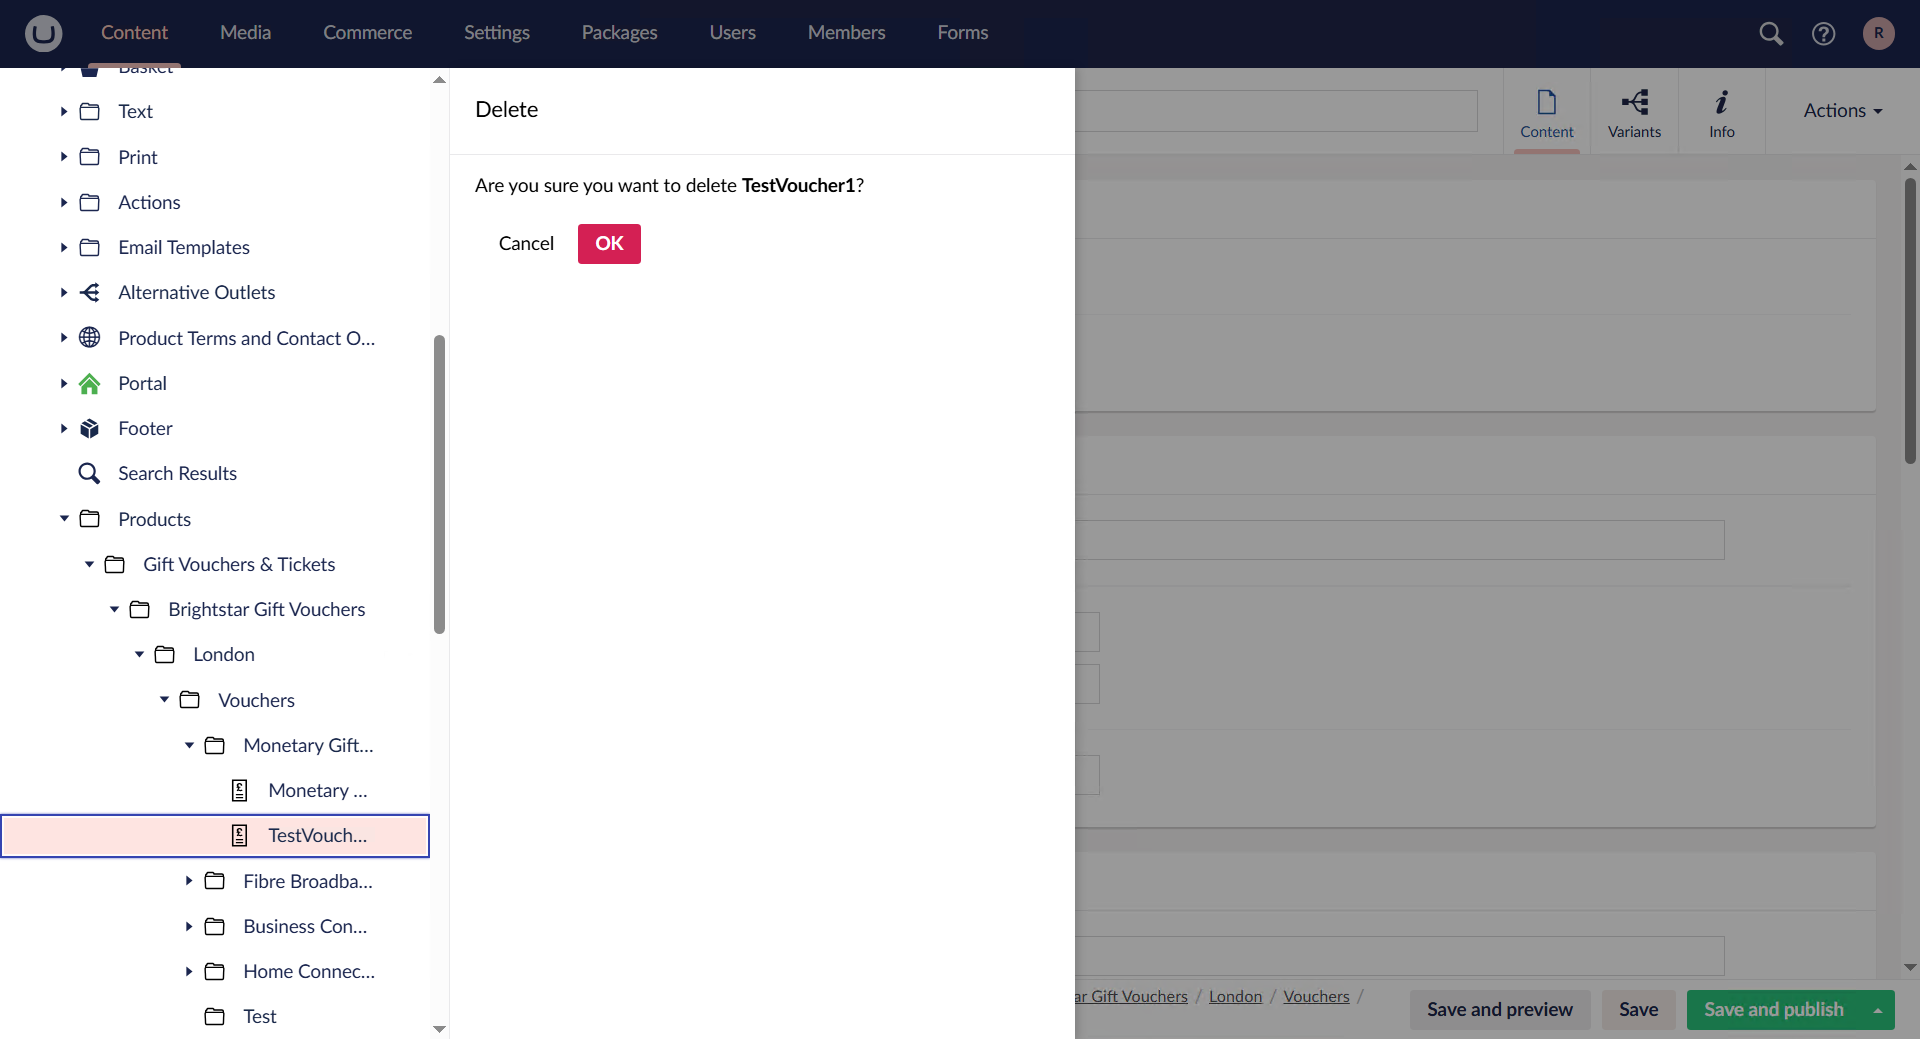
Once the “Delete” button has been clicked, a confirmation popup will appear to ensure the staff member truly intends to delete the voucher. The staff member must then click the red “OK” button to complete the deletion.
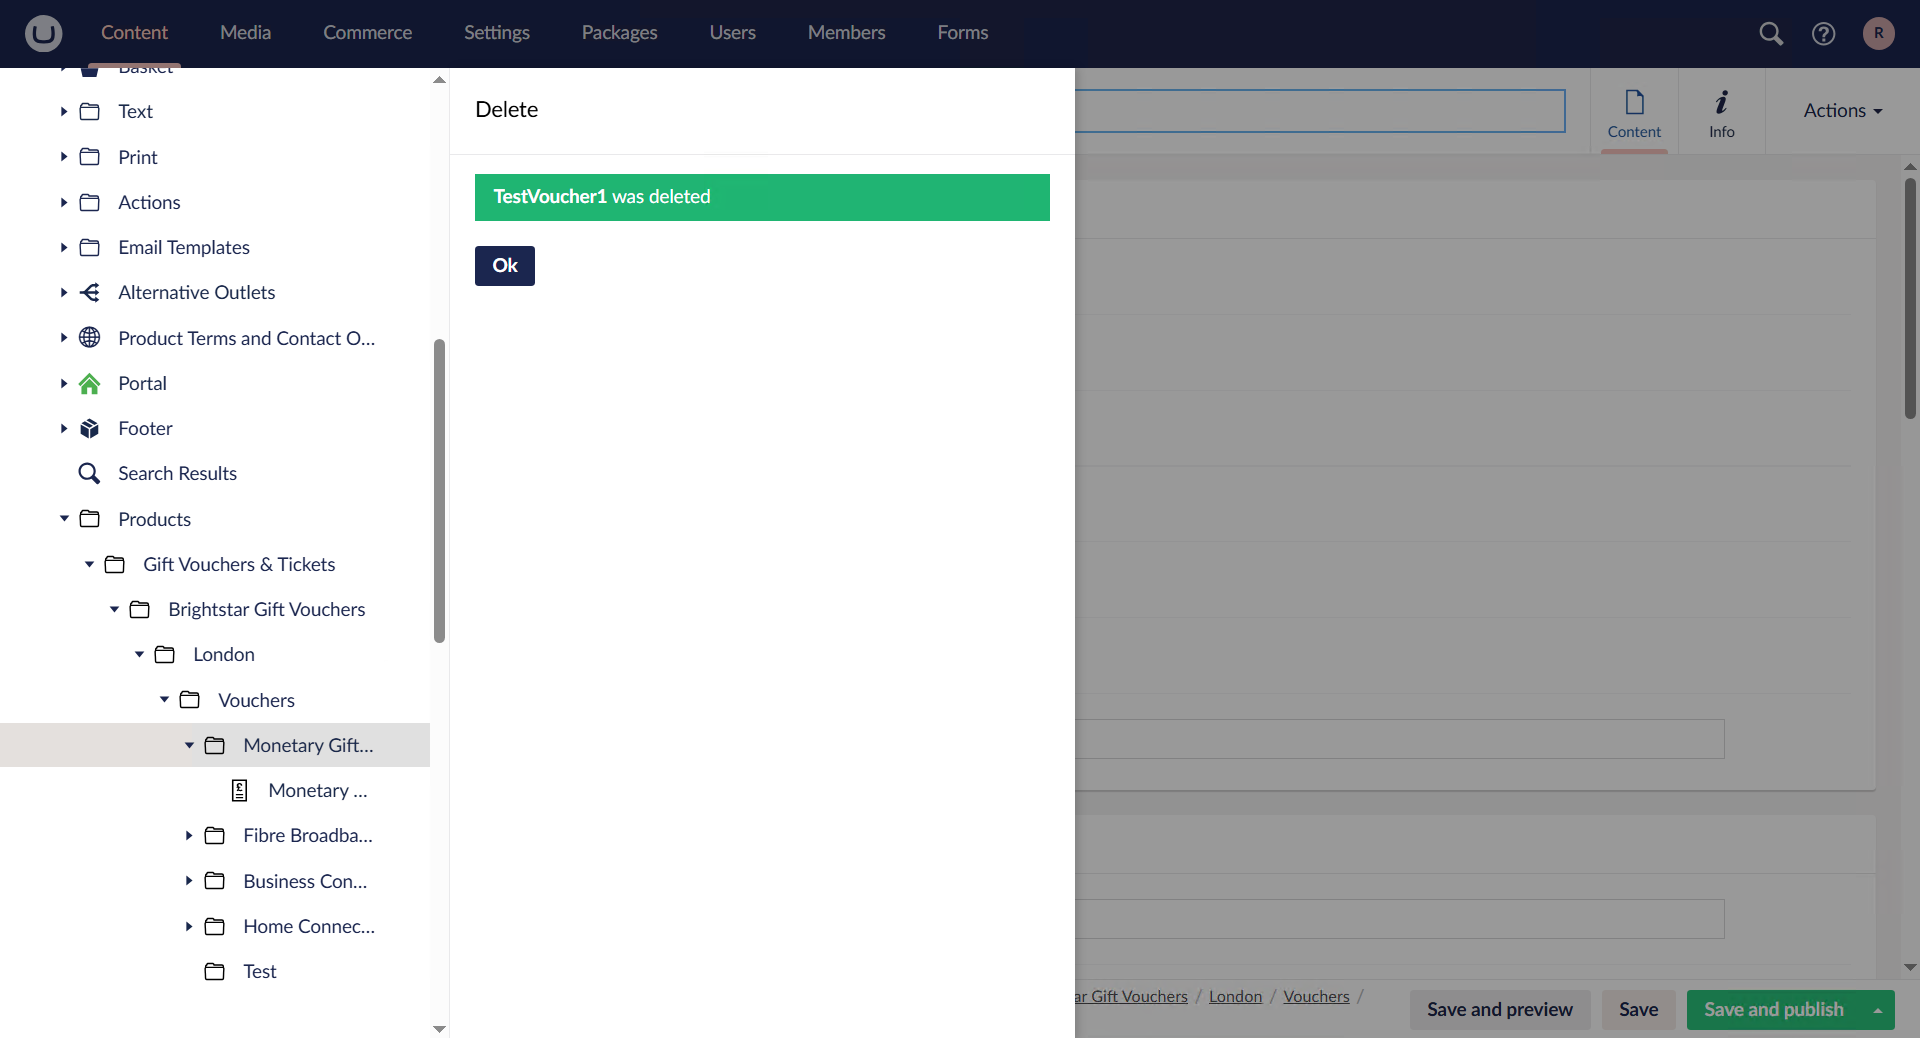
When the staff member clicks the red “OK” button, a final popup will appear confirming that the voucher has been deleted. Refreshing the company website will show that the voucher is no longer present, confirming to the staff member that the deletion was successful.